> ## Documentation Index
> Fetch the complete documentation index at: https://help.draftable.com/llms.txt
> Use this file to discover all available pages before exploring further.
# API Self-hosted AWS EC2 deployment guide
> If you intend on using AWS EC2 to host your Draftable Self-hosted image, this guide provides a step by step process for this exact deployment.
**This documentation is for API Self-Hosted Version 2 (Legacy)**
Version 2 is a legacy deployment model. All new customers **must** use Version 3, which features a modern multi-container architecture with improved security and performance.
👉 [Get started with API Self-Hosted v3](/hc/en-us/articles/51133475373465-API-Self-Hosted-v3-Quick-Start-Guide)
## Prerequisites
You will need to ensure you have the following ready before beginning this deployment.
1. You have logged into your AWS console with elevated privileges
2. You have selected the correct region in the AWS console where you are going to host your instance
## Deployment steps
The deployment steps are broken down into the following sections.
* [User configuration:](#user-configuration) Account configuration for the AWS user that will interact with the instance configuration.
* [Launching a EC2 instance](#launching-a-ec2-instance): Process of the initial configuration for your EC2 instance.
* [Instance configuration](#instance-configuration): Adding the Draftable container to your instance, configuring the Self-hosted instance and restarting your container with Self-hosted configured.
### User configuration
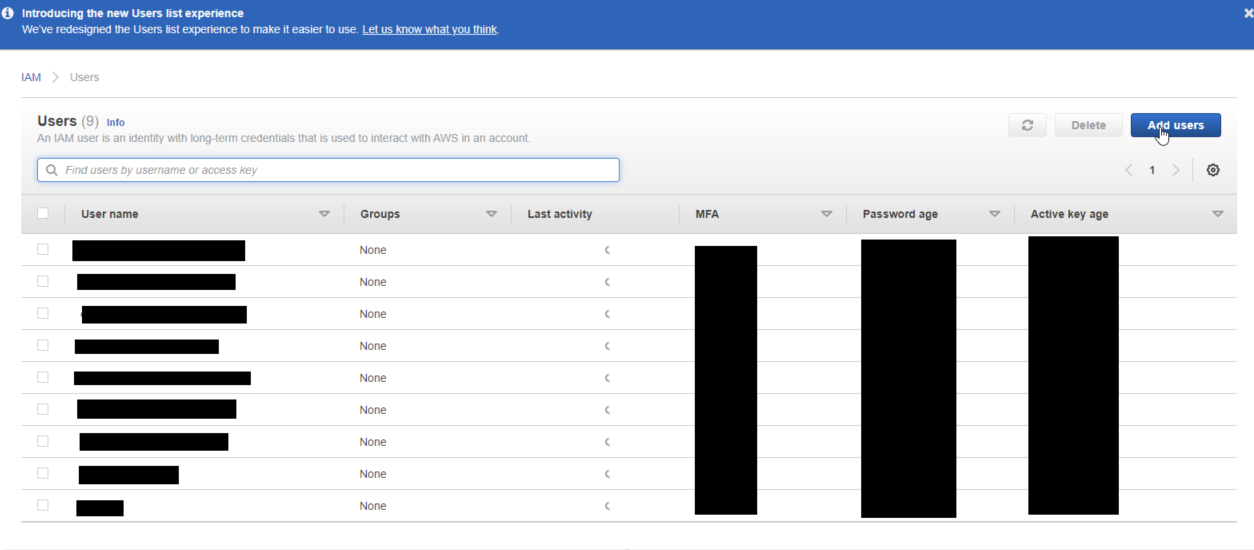
Navigate to your **IAM users.** We are going to create a new user by selecting the **add users** option. (**Note:** if editing an existing user account instead skip to step 5)
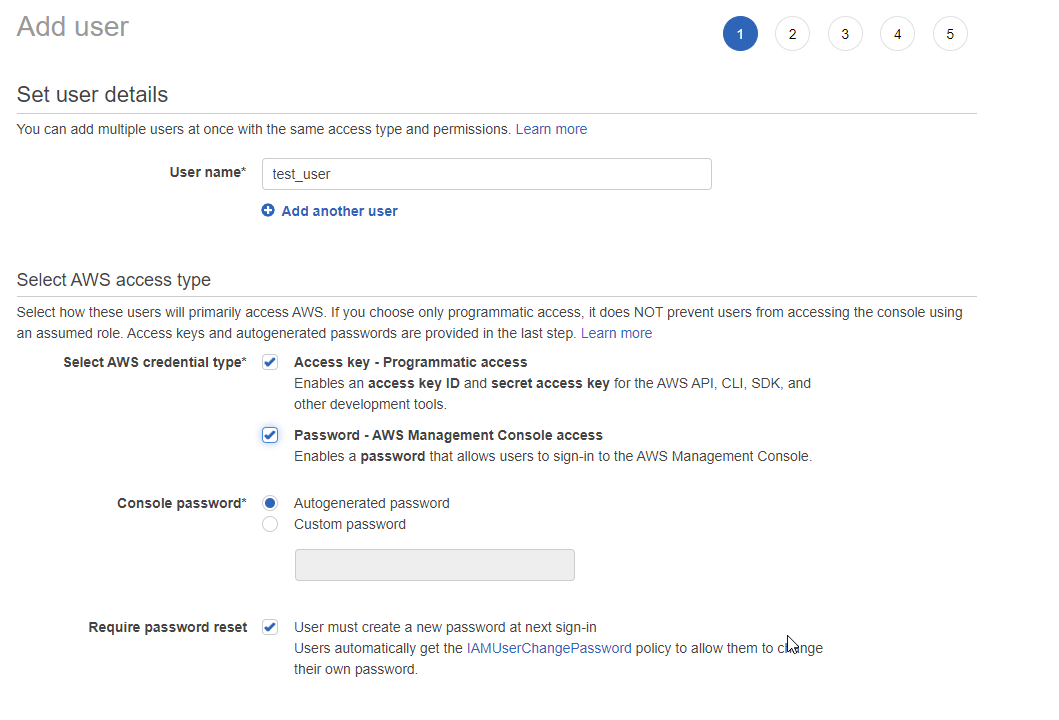
 Enter details for the new user, ensure that you have the following AWS credential parameters enabled: **Access Key** and **Password.** Then click **next**.
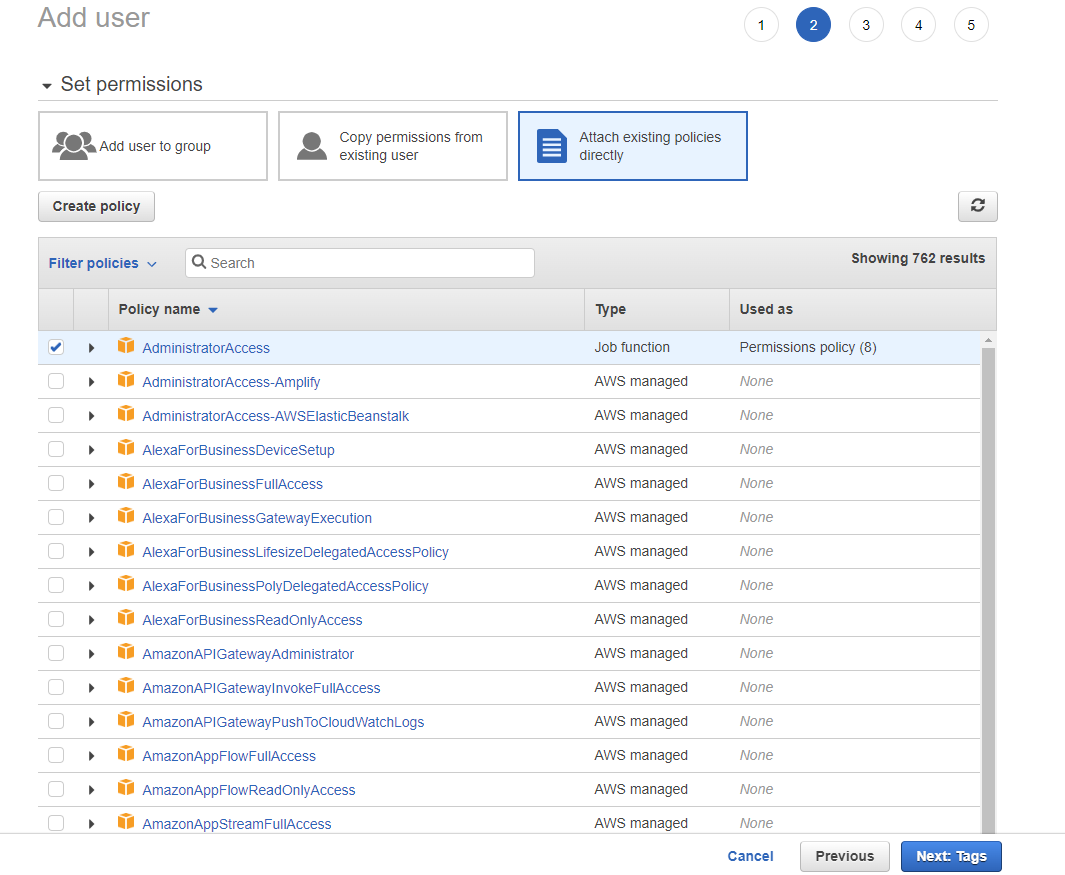
 Now we include specific policies on the account. Ensure you include the *AdministratorAccess* and *IAMUserChangePassword* policies to the account. Then click **next**.
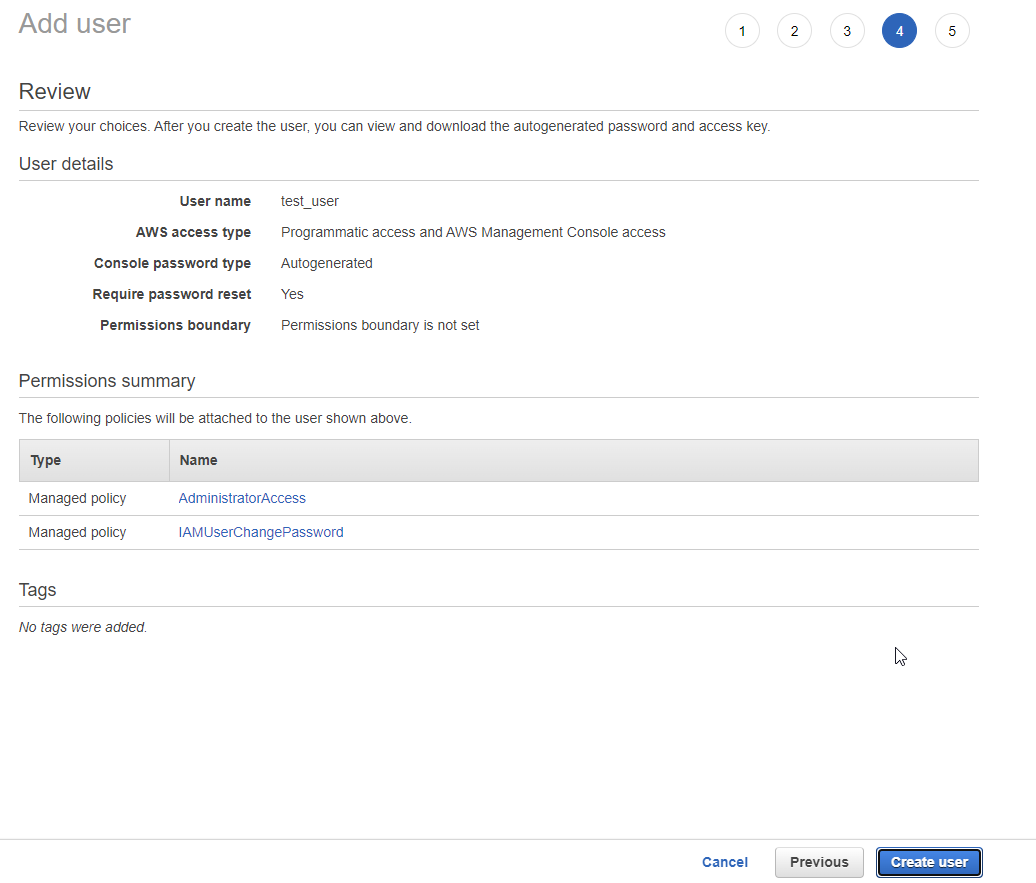
 Ignoring the **tags** step, go straight to the **review** page. Ensure that the two policies we added earlier are present. If all looks good, click **create user**.
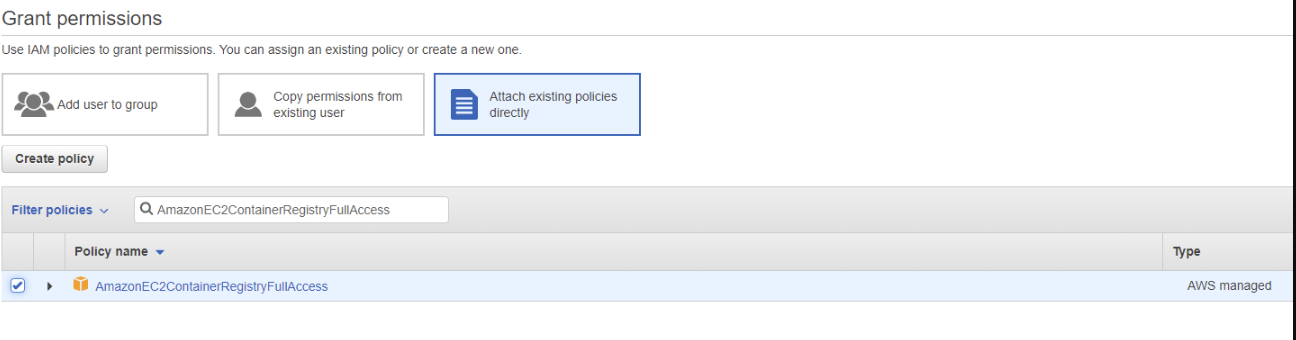
 Open the user account again and go the **permissions** page. We to add an additional permission called *AmazonEC2ContainerRegistryFullAccess.* Add this policy and hit **next,** then **add permissions**.

 ### Launching a EC2 instance
#### **Prerequisites**
Ensure you have setup the following:
* Logged into the AWS console as the user created/edit in the user configuration section.
* Have the correct region selected before continuing with instance setup.
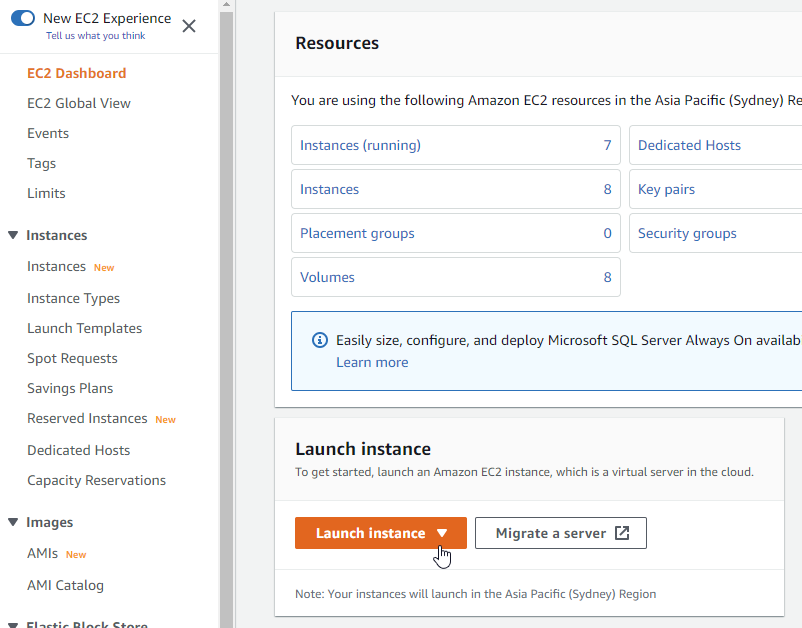
Navigate to the **EC2 dashboard** and select the **Launch instance** option.
### Launching a EC2 instance
#### **Prerequisites**
Ensure you have setup the following:
* Logged into the AWS console as the user created/edit in the user configuration section.
* Have the correct region selected before continuing with instance setup.
Navigate to the **EC2 dashboard** and select the **Launch instance** option.
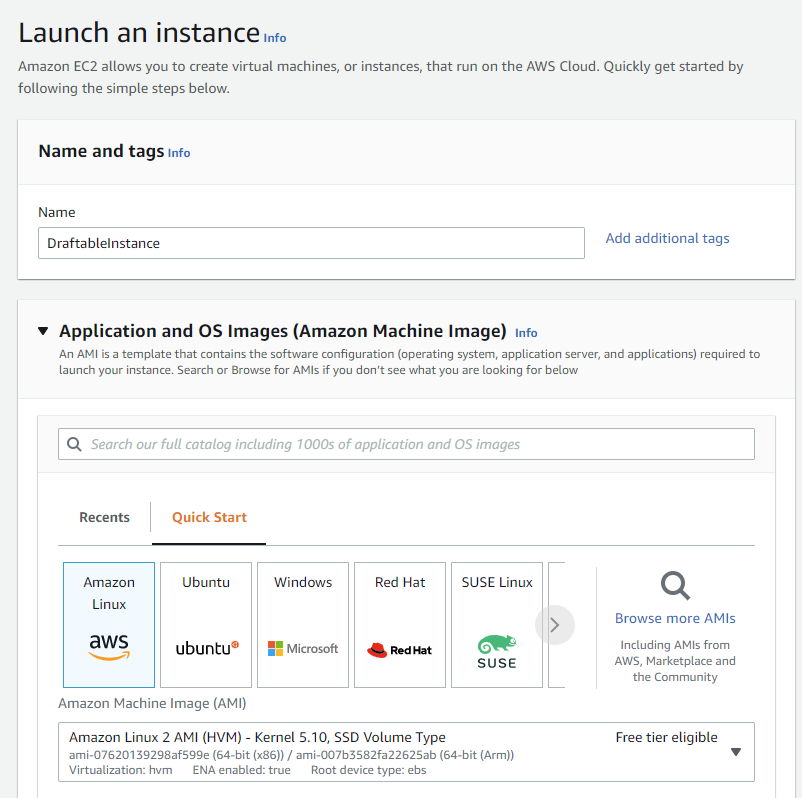
 Draftable API Self-hosted runs on any Linux operating system which has both docker support and uses a Linux kernel. Provide a **name** for your instance and then select **Amazon Linux** as the AMI.
You can deviate from the example below and choose a different Linux operating system, as long as it still supports the above requirements.
Draftable API Self-hosted runs on any Linux operating system which has both docker support and uses a Linux kernel. Provide a **name** for your instance and then select **Amazon Linux** as the AMI.
You can deviate from the example below and choose a different Linux operating system, as long as it still supports the above requirements.
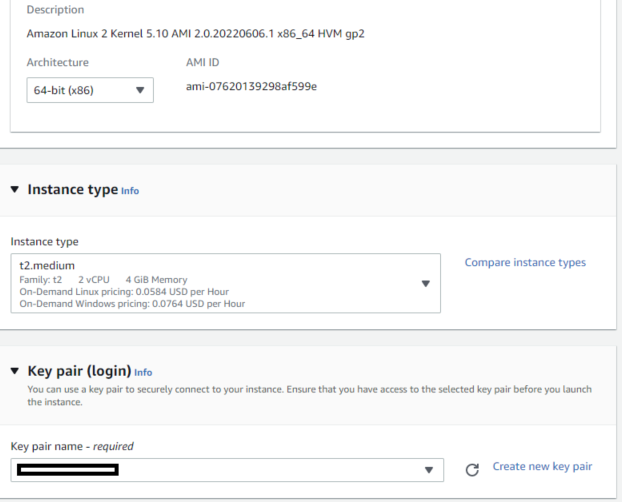
 Continue to configure the instance by selecting a **x64** architecture, and then selecting a instance type that is at least **t2.medium** or higher. Key pair should be the same one used as part as the login for the AWS user.
 Configure the **network settings** as detailed below, create a new **firewall security group** and allow **SSH**, **HTTPS** and **HTTP** traffic from the internet. Depending on your use case you may want to change some of these parameters at a later time, but for the configuration process please allow all during the setup process.
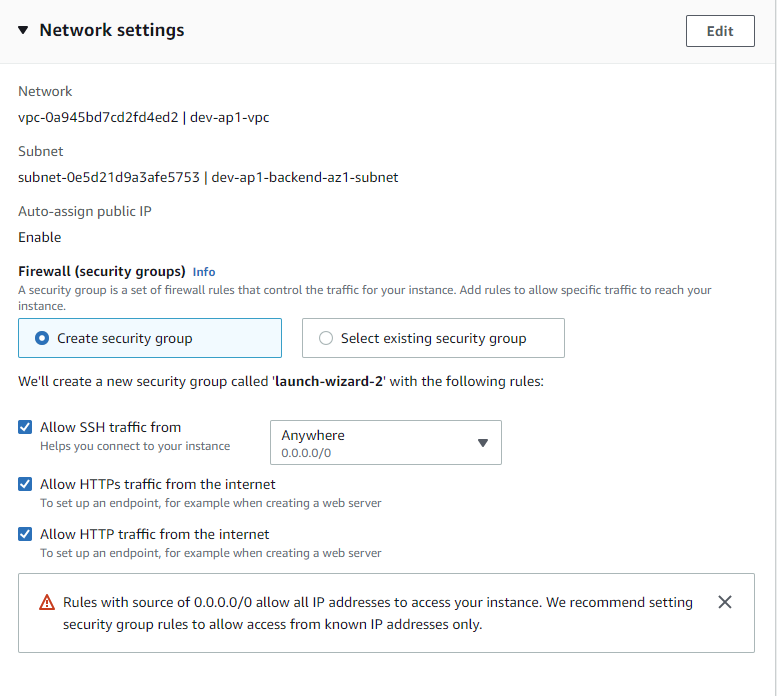 Following this configuration, you should be left with a following summary of settings. Ensure they are correct to the settings provided earlier.
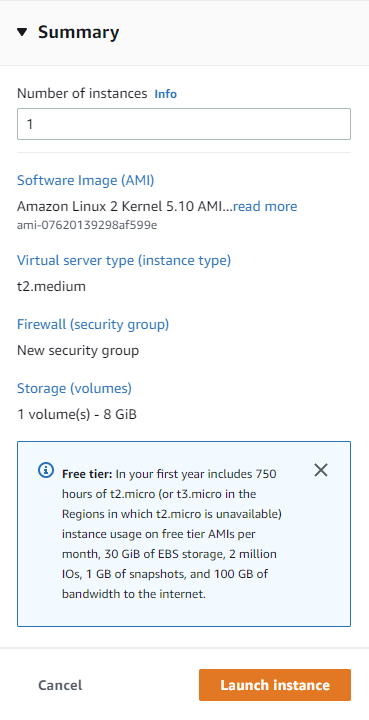 Click **launch instance.** Your EC2 instance should now be running.
### Instance configuration
#### **Prerequisites**
Ensure you have setup the following:
* Logged into the AWS console as the user created/edit in the user configuration section.
* Are on the **instances** page before continuing.
Select on your newly created instance and click on **connect to your instance.** Ensure the username s correct and then select **connect**.
Click **launch instance.** Your EC2 instance should now be running.
### Instance configuration
#### **Prerequisites**
Ensure you have setup the following:
* Logged into the AWS console as the user created/edit in the user configuration section.
* Are on the **instances** page before continuing.
Select on your newly created instance and click on **connect to your instance.** Ensure the username s correct and then select **connect**.
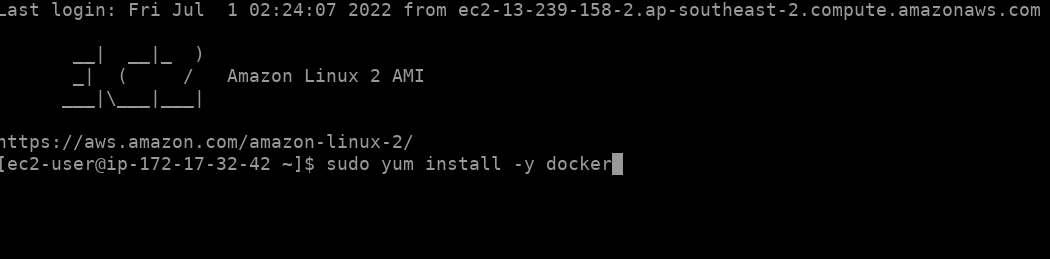
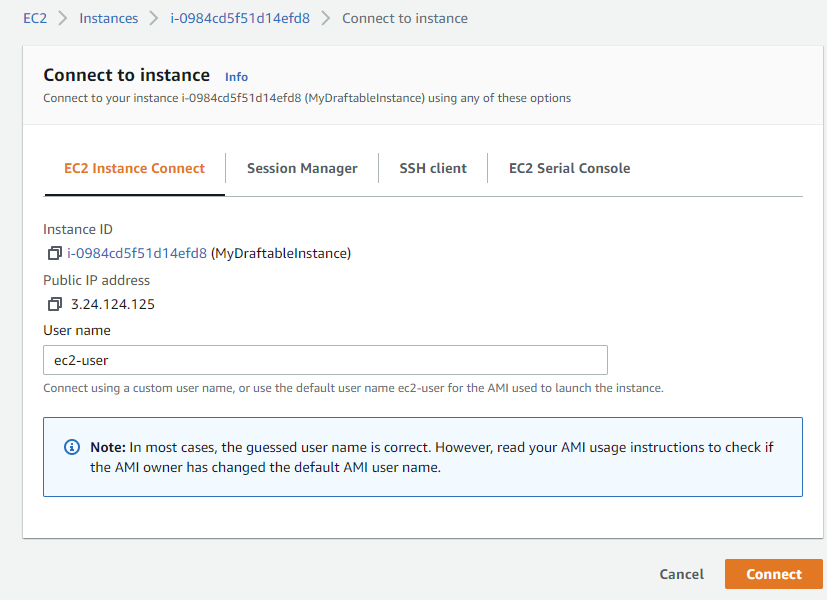 In this instance terminal we will configure and add the latest Draftable Self-hosted image. First we need to add docker to the instance, which can be done with the command below:
```bash theme={null}
sudo yum install -y docker
```
In this instance terminal we will configure and add the latest Draftable Self-hosted image. First we need to add docker to the instance, which can be done with the command below:
```bash theme={null}
sudo yum install -y docker
```
 Now we need to add docker-compose to the instance, use the commands below:
```bash theme={null}
sudo curl -L https://github.com/docker/compose/releases/latest/download/docker-compose-$(uname -s)-$(uname -m) -o /usr/local/bin/docker-compose
```
```bash theme={null}
sudo chmod +x /usr/local/bin/docker-compose
```
Now we need to add docker-compose to the instance, use the commands below:
```bash theme={null}
sudo curl -L https://github.com/docker/compose/releases/latest/download/docker-compose-$(uname -s)-$(uname -m) -o /usr/local/bin/docker-compose
```
```bash theme={null}
sudo chmod +x /usr/local/bin/docker-compose
```
 We can now verify that docker compose has installed correctly by using the command below:
```bash theme={null}
docker-compose version
```
We can now verify that docker compose has installed correctly by using the command below:
```bash theme={null}
docker-compose version
```
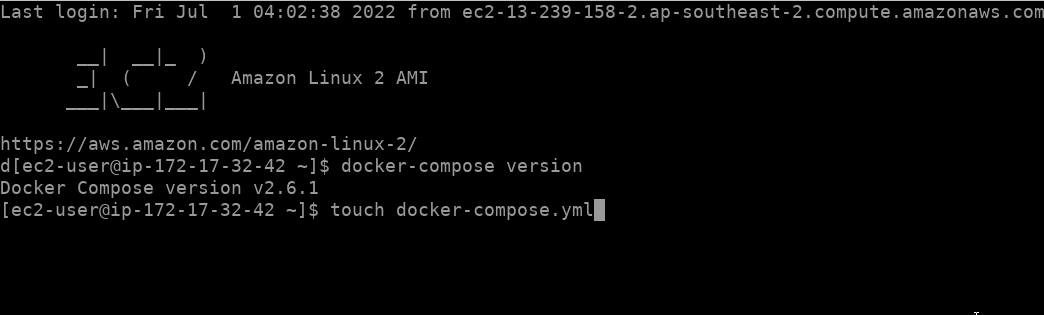 Now create the ***docker-compose.yml*** file, use the command below:
```bash theme={null}
touch docker-compose.yml
```
Now we need to edit the *docker-compose* file to add all the correct parameters for the instance. To start editing the file use the command below:
```bash theme={null}
nano docker-compose.yml
```
Now using this file editor, populate the YAML file with the correct configuration. For references on this topic see our [docker-compose guide](/hc/en-us/articles/6140153331993-Using-docker-compose-to-launch-instances) and [settings reference.](/hc/en-us/articles/6140653011865-Understanding-the-docker-compose-yml-file-and-parameters-guide) For this example we are using the most basic YAML configuration.
Now create the ***docker-compose.yml*** file, use the command below:
```bash theme={null}
touch docker-compose.yml
```
Now we need to edit the *docker-compose* file to add all the correct parameters for the instance. To start editing the file use the command below:
```bash theme={null}
nano docker-compose.yml
```
Now using this file editor, populate the YAML file with the correct configuration. For references on this topic see our [docker-compose guide](/hc/en-us/articles/6140153331993-Using-docker-compose-to-launch-instances) and [settings reference.](/hc/en-us/articles/6140653011865-Understanding-the-docker-compose-yml-file-and-parameters-guide) For this example we are using the most basic YAML configuration.
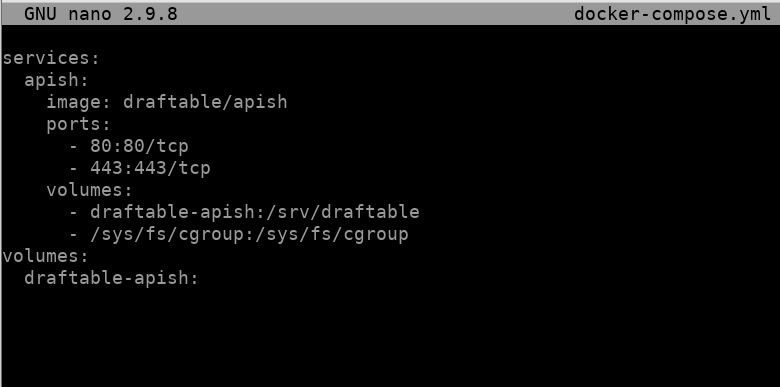 Save and close the *docker-compose* file, and then start the docker daemon with the following command:
```bash theme={null}
sudo systemctl start docker
```
Now start the instance using the command below: docker-compose up
You may receive a permissions error regarding the instance trying to connect to the Docker Daemon. If so run this command to correct permissions:
```
sudo chmod 666 /var/run/docker.sock
```
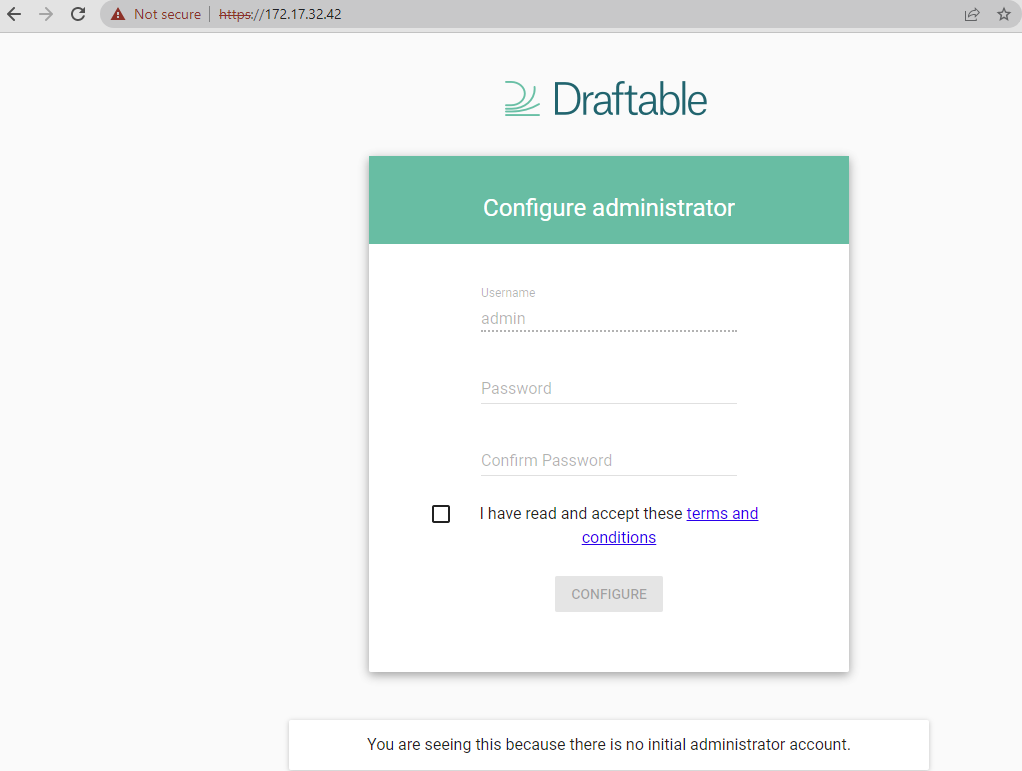
Your instance should launch from here. You can go back to your **EC2 instances** list and extract a IP address to connect to your instance via the web browser to start configuration.
Save and close the *docker-compose* file, and then start the docker daemon with the following command:
```bash theme={null}
sudo systemctl start docker
```
Now start the instance using the command below: docker-compose up
You may receive a permissions error regarding the instance trying to connect to the Docker Daemon. If so run this command to correct permissions:
```
sudo chmod 666 /var/run/docker.sock
```
Your instance should launch from here. You can go back to your **EC2 instances** list and extract a IP address to connect to your instance via the web browser to start configuration.
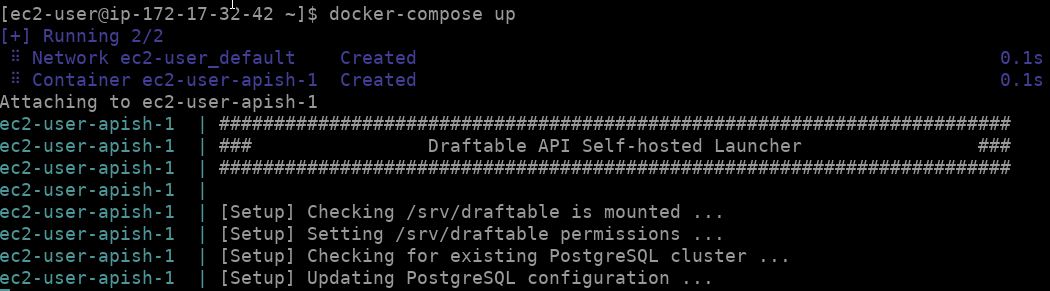 From here, please refer to our [first time configuration guide](/hc/en-us/articles/8424839618457-Draftable-Self-hosted-instance-first-time-configuration).
 If you are having difficulty following this guide or getting Draftable Self-hosted to work on your AWS EC2, please get in contact with our support team at [support@draftable.com.](mailto:support@draftable.com)