> ## Documentation Index
> Fetch the complete documentation index at: https://help.draftable.com/llms.txt
> Use this file to discover all available pages before exploring further.
# Redline in Email workaround: create a text redline in Draftable Legal
> When Redline in Email cannot be used for a text-only change, you can build the redline directly in Draftable Legal using Text Input and paste it back into your email reply.
Redline in Email is the quickest way to mark up an email reply, but there are situations where it cannot complete the job: the add-in panel is blank or will not load, the message is too large for Outlook to process, or the redline will not apply back to your reply. When the change you need to show is essentially **text**, you can produce the same redline manually in Draftable Legal and paste it into your email.
This article shows that workaround.
This is a **text-only** workaround. It is best for plain wording changes to the body of an email. It does not carry across attachments, embedded images, or complex formatting such as multi-level numbered lists and tables. For those, use the standard Redline in Email workflow once the underlying issue is resolved.
## When to use this
Consider this workaround when you are trying to redline text in an email and Redline in Email will not cooperate, for example:
* The Redline in Email panel is blank or does not load.
* You see a "message too long" or size limit error when creating or updating the email.
* The **Create New Email** or copy step does not complete.
* The redline is not applying to the text content of your reply.
Before using the workaround, it is worth confirming the two most common causes of these symptoms:
1. **Draftable Legal must be running** in the background (system tray) for Redline in Email to work. Launch it first, then try again.
2. If the add-in still misbehaves, try [clearing the add-in cache](/hc/en-us/articles/How-to-clear-the-add-in-cache-in-Draftable-Legal) and [restarting Draftable Legal](/hc/en-us/articles/39934335355033-How-to-properly-restart-Draftable-Legal).
If the feature works after that, you do not need this workaround.
## Before you start
* Draftable Legal is installed and open.
* You can copy the text you want to compare from your email (the original text and your edited version).
## Build the redline in Draftable Legal
In Outlook, select the section of the email you want to redline and copy it (Ctrl+C). You will paste this into Draftable in the next steps. You will do this twice: once for the original text, and once for your edited version.
Open Draftable Legal and start a **New Comparison**. On the **Older document** side, click **Text Input** (the pencil icon), then paste your original text.
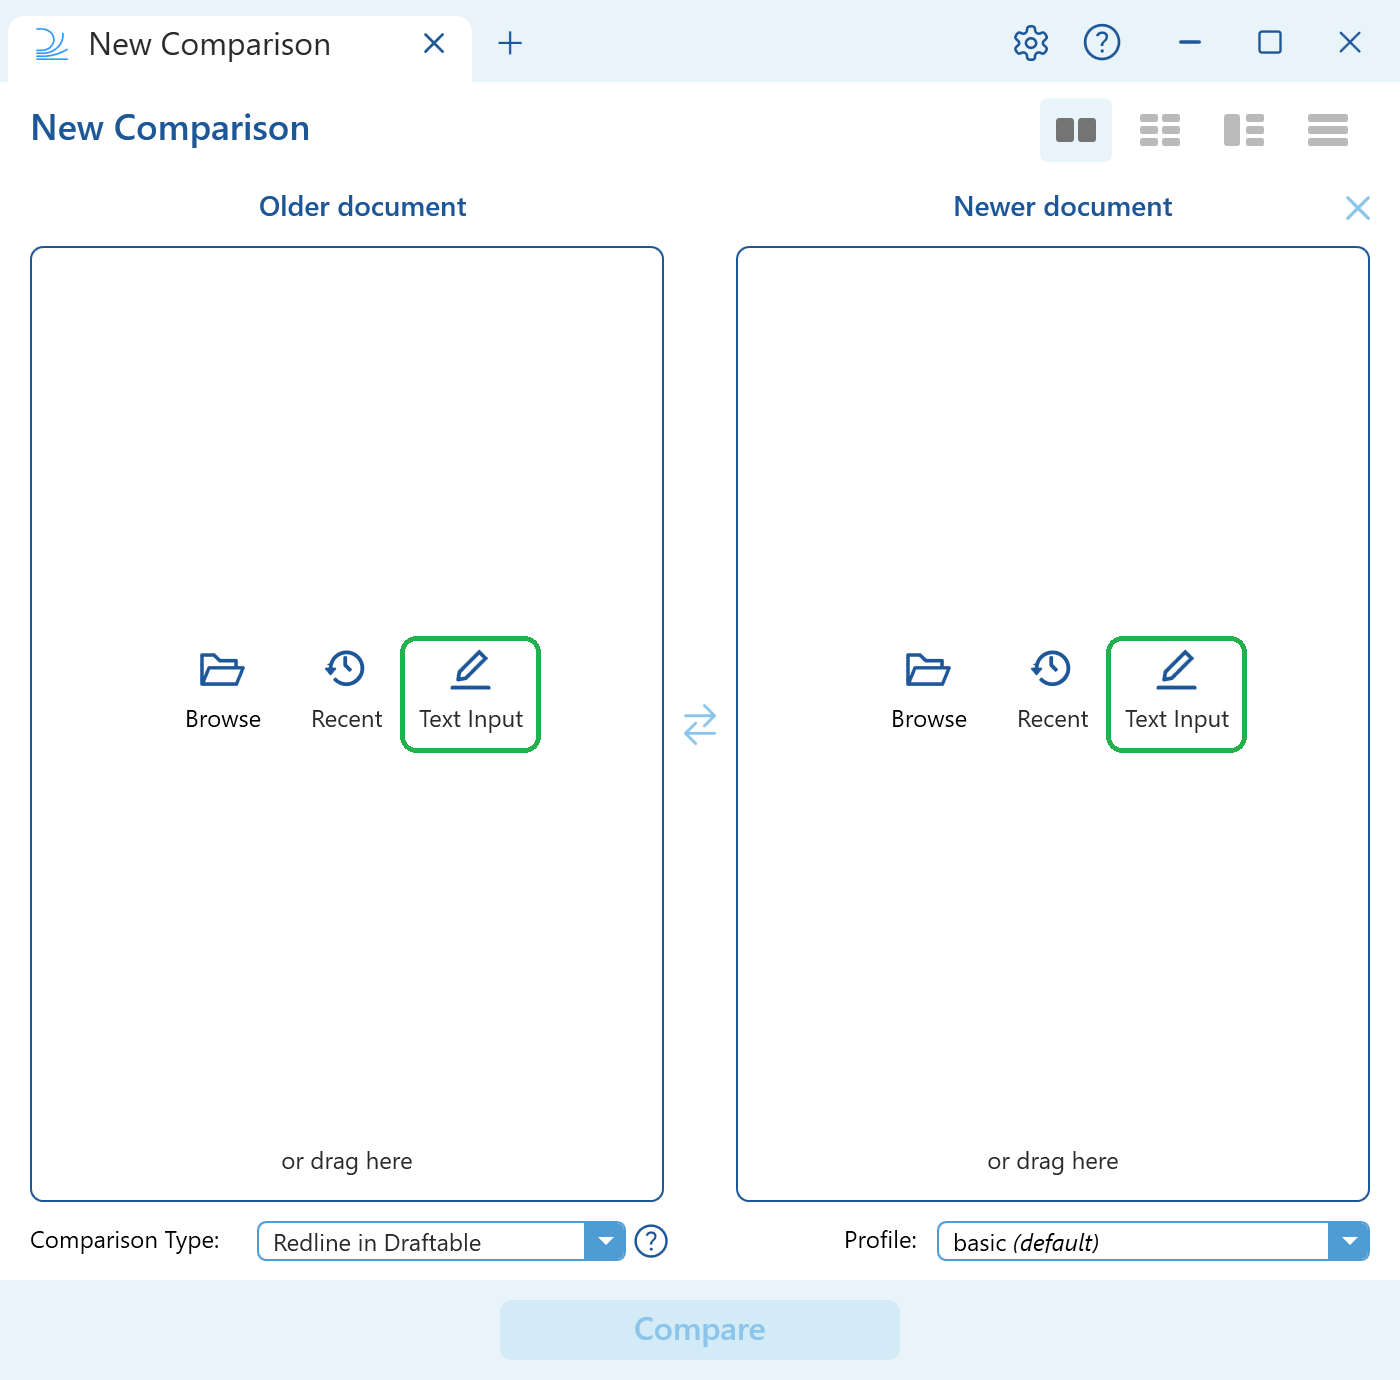 On the **Newer document** side, click **Text Input** and paste your edited version of the text.
A quick way to do this is to paste the original text on both sides, then edit the text on the newer side directly in the box until it reads the way you want your reply to read.
As soon as both sides contain text, the **Redline preview** appears underneath, updating automatically as you type. Deletions are shown struck through and insertions are underlined, exactly as they will appear in your email.
On the **Newer document** side, click **Text Input** and paste your edited version of the text.
A quick way to do this is to paste the original text on both sides, then edit the text on the newer side directly in the box until it reads the way you want your reply to read.
As soon as both sides contain text, the **Redline preview** appears underneath, updating automatically as you type. Deletions are shown struck through and insertions are underlined, exactly as they will appear in your email.
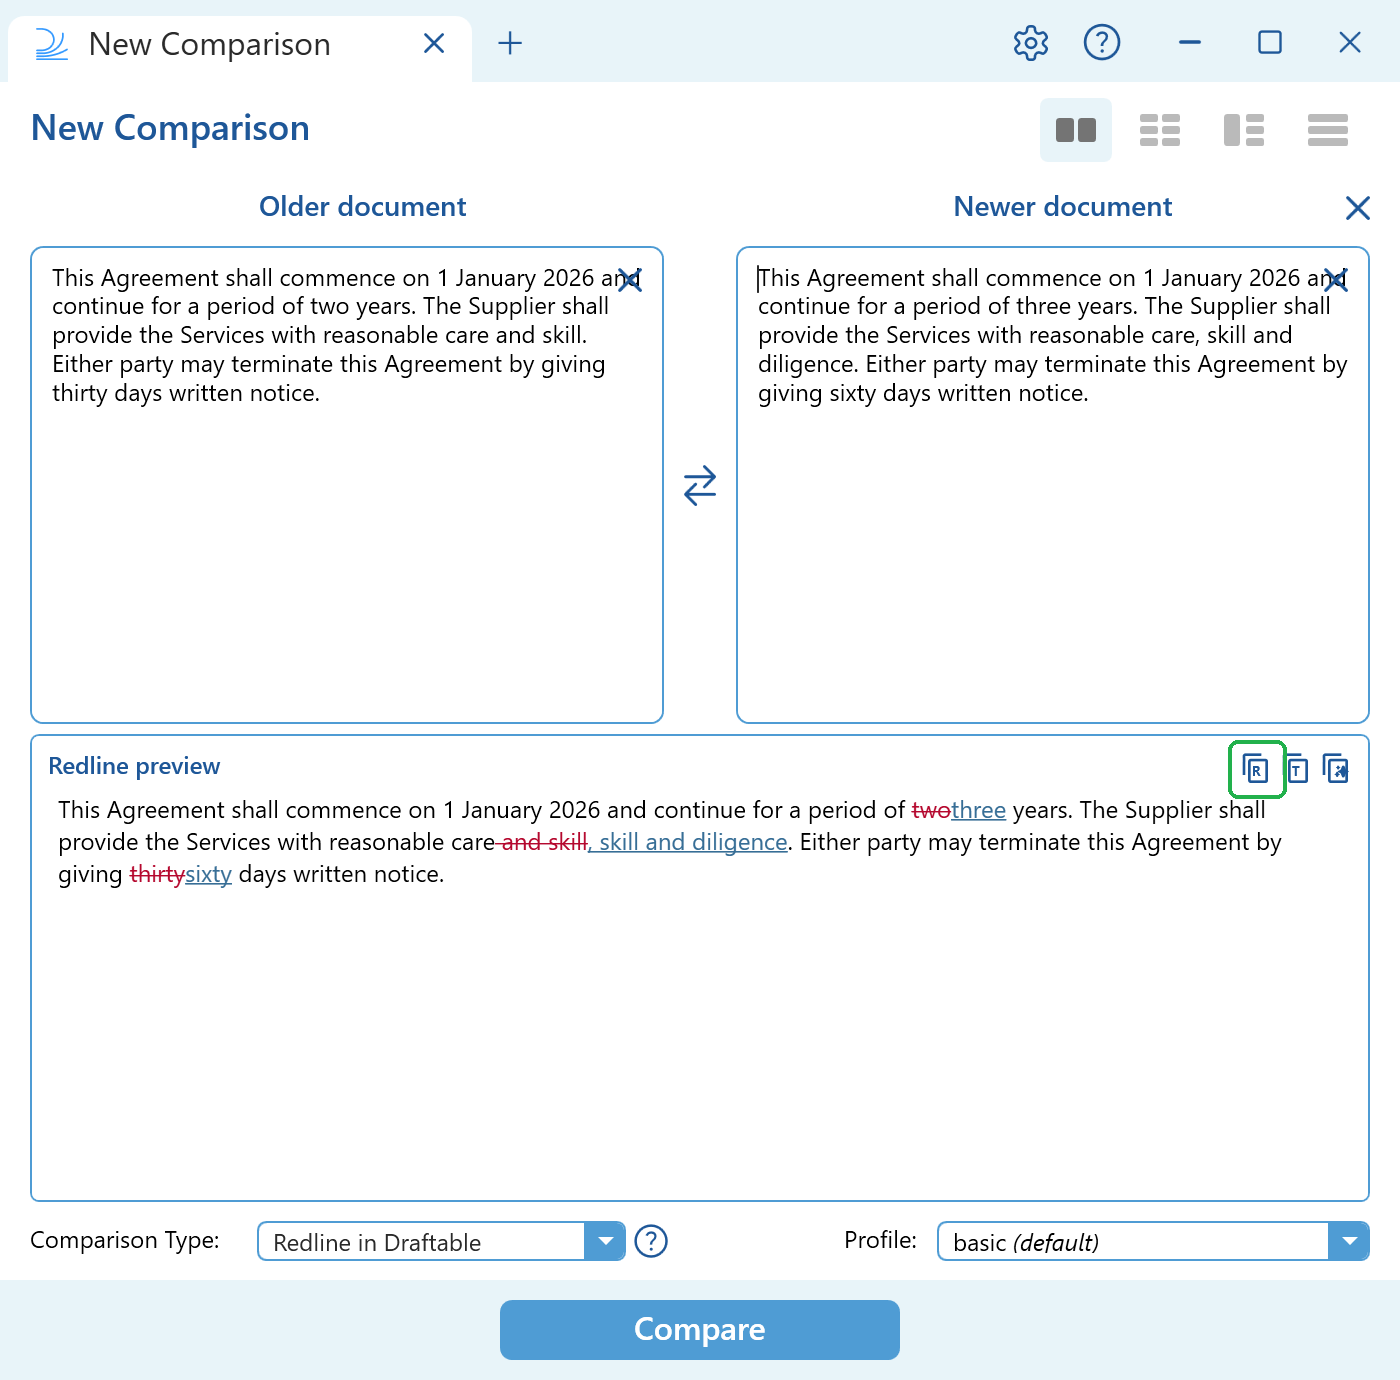 In the top right of the **Redline preview**, click **Copy As Redline** (the icon marked with an "R"). This copies the redline to your clipboard with its formatting, ready to paste into an email.
Two other copy options sit next to it: **Copy As Tracked Changes** (paste into a Word document as tracked changes) and **Copy AI-Ready Redline** (a plain-text redline for use with AI tools). For an email reply, use **Copy As Redline**.
Switch back to your Outlook reply and paste (Ctrl+V). The redline pastes in with its formatting, so your recipient can see the deletions and insertions. Finish and send your reply as normal.
## Limitations
* This approach redlines **text only**. It does not handle attachments, images, or complex formatting.
* The pasted redline is a visual markup of the text. It is not a live Redline in Email session, so the recipient cannot use **Accept or reject changes** on it. If you need that behaviour, use the standard [Redline in Email workflow](/hc/en-us/articles/46382010730905-Using-Draftable-Redline-in-Email).
If Redline in Email continues to fail after checking the causes above, please contact the support team at [support@draftable.com](mailto:support@draftable.com) so we can investigate.
In the top right of the **Redline preview**, click **Copy As Redline** (the icon marked with an "R"). This copies the redline to your clipboard with its formatting, ready to paste into an email.
Two other copy options sit next to it: **Copy As Tracked Changes** (paste into a Word document as tracked changes) and **Copy AI-Ready Redline** (a plain-text redline for use with AI tools). For an email reply, use **Copy As Redline**.
Switch back to your Outlook reply and paste (Ctrl+V). The redline pastes in with its formatting, so your recipient can see the deletions and insertions. Finish and send your reply as normal.
## Limitations
* This approach redlines **text only**. It does not handle attachments, images, or complex formatting.
* The pasted redline is a visual markup of the text. It is not a live Redline in Email session, so the recipient cannot use **Accept or reject changes** on it. If you need that behaviour, use the standard [Redline in Email workflow](/hc/en-us/articles/46382010730905-Using-Draftable-Redline-in-Email).
If Redline in Email continues to fail after checking the causes above, please contact the support team at [support@draftable.com](mailto:support@draftable.com) so we can investigate.