- Redline in Excel (In Draftable and in Excel)
- Side by Side comparison
Video Resource
This topic is included in our specially crafted explainer video.
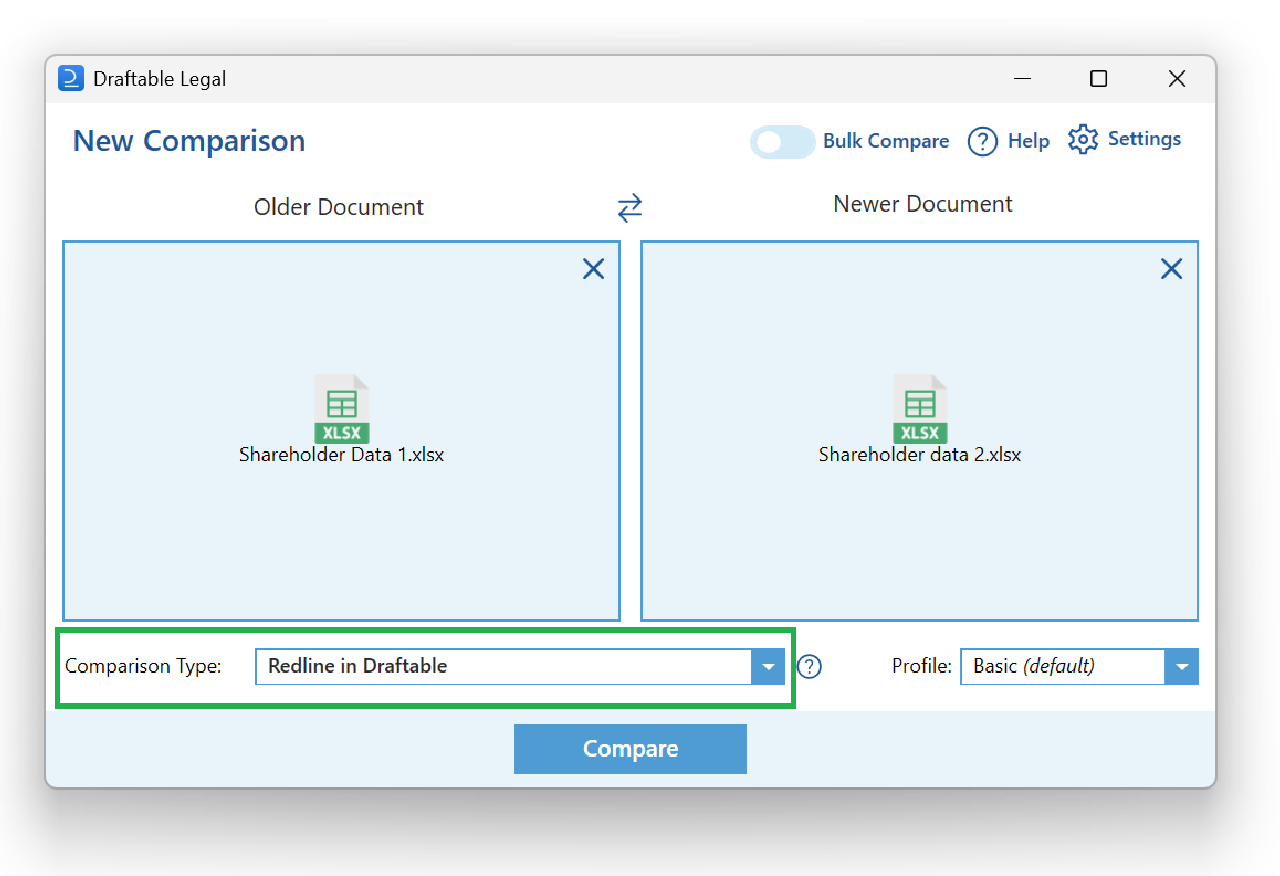
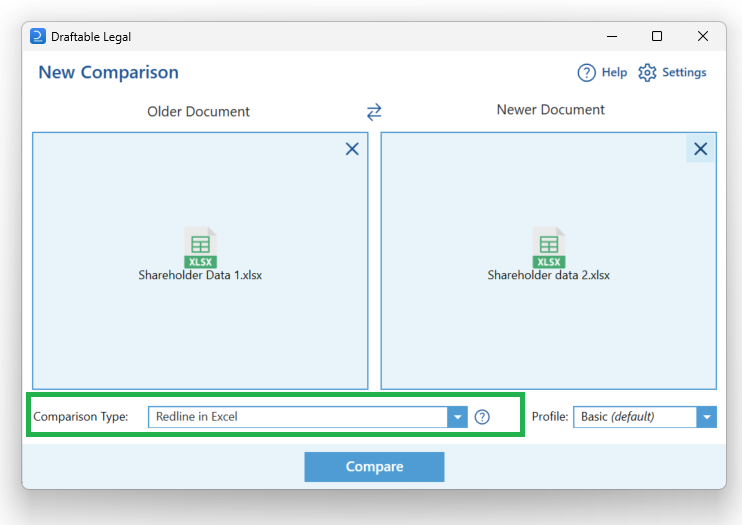
Comparing Excel files in the Redline Comparison Type in Draftable

Select the two documents you want to compare, either by browsing your files or dragging and dropping them into the compare window.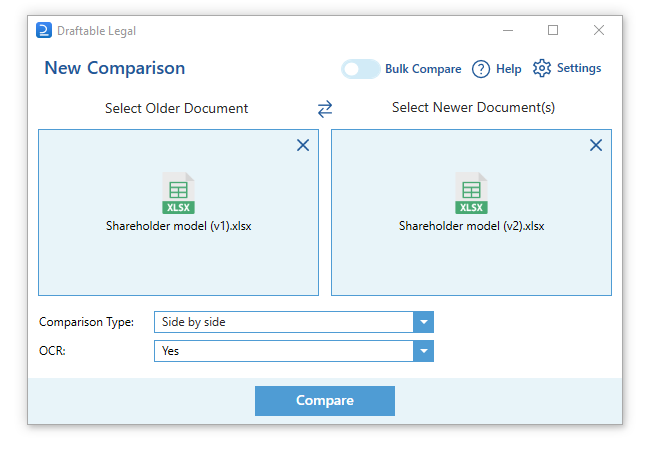
Reviewing your comparison in Draftable
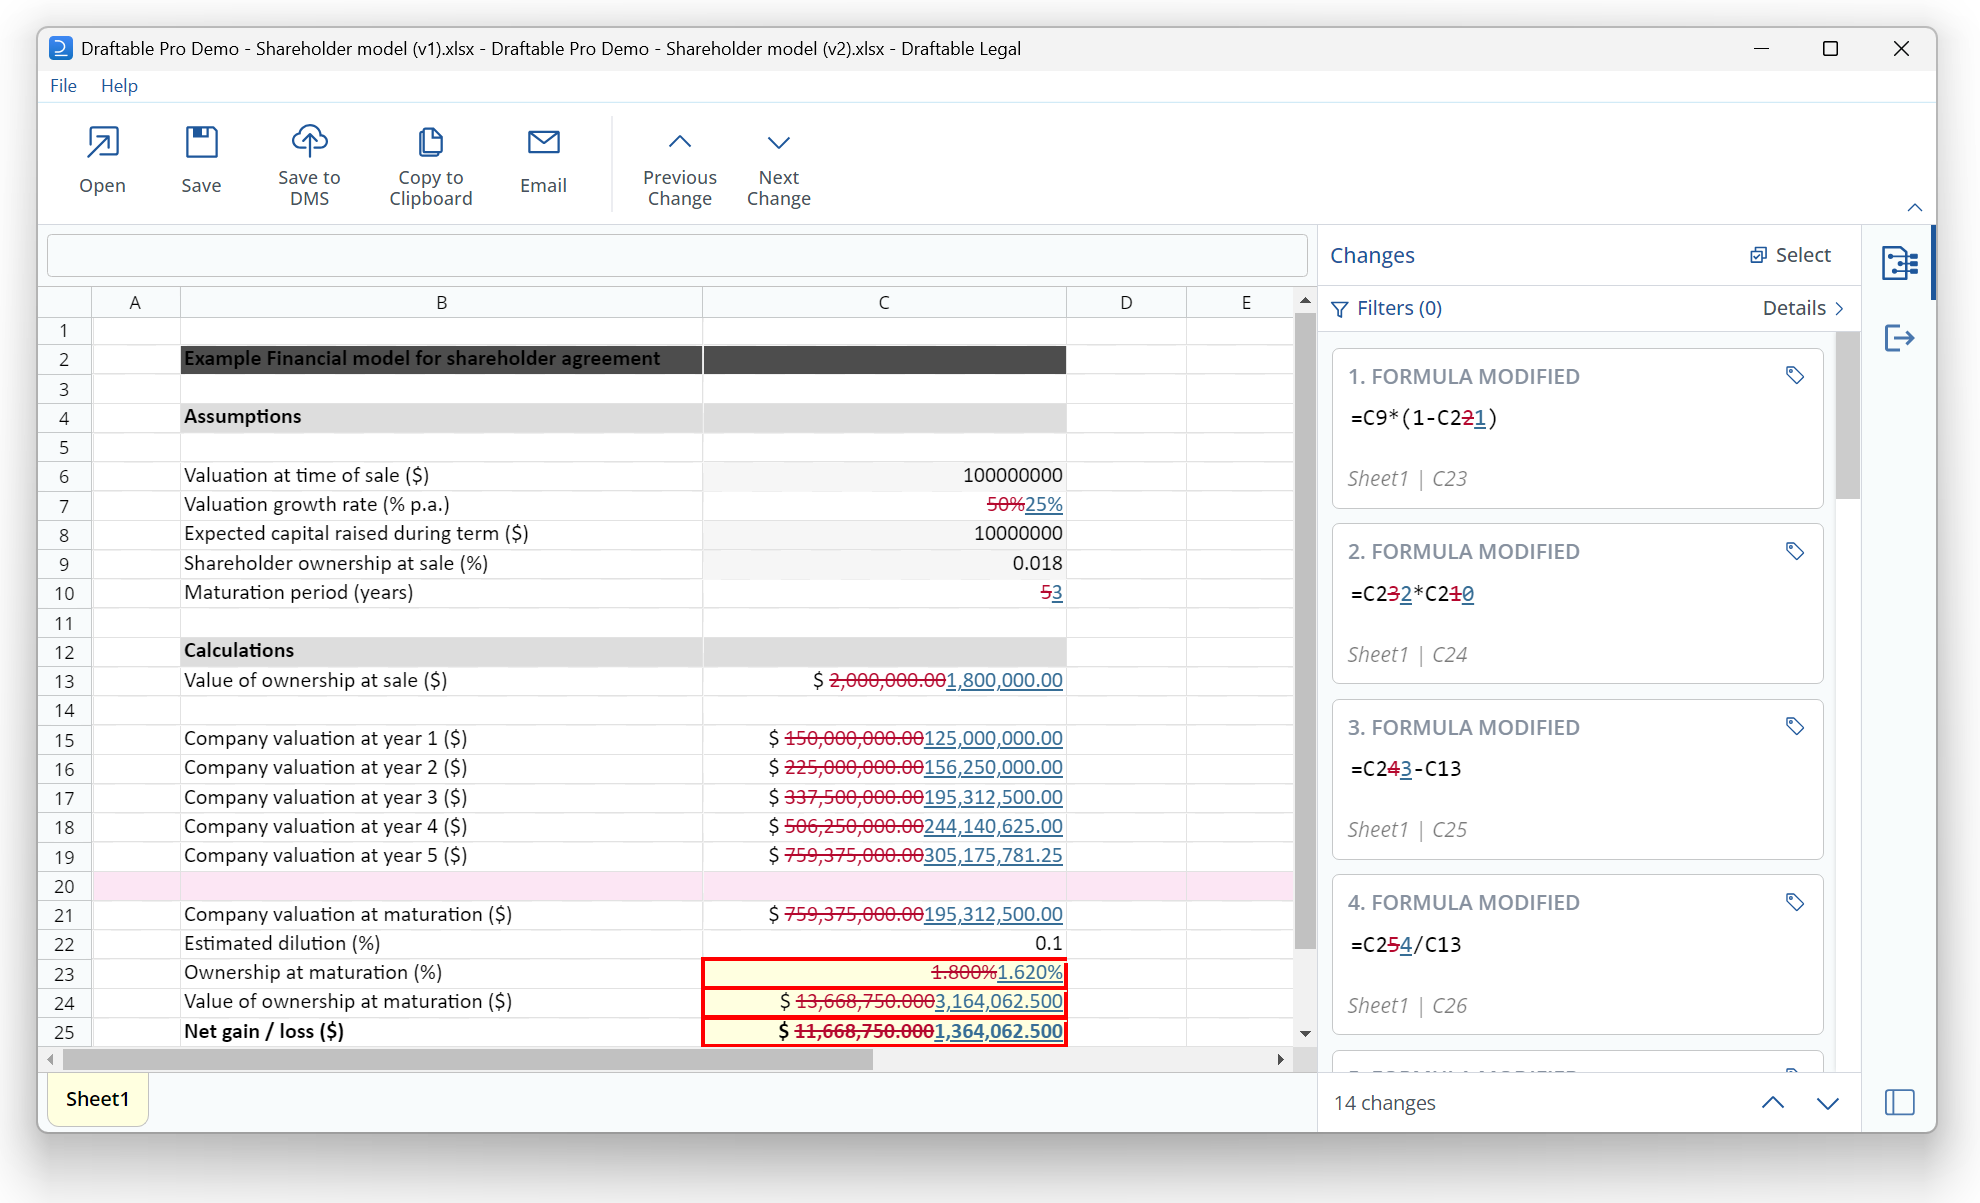
The Redline Comparison Viewer shows all changes in a dynamic Change List on the right-hand side of the screen.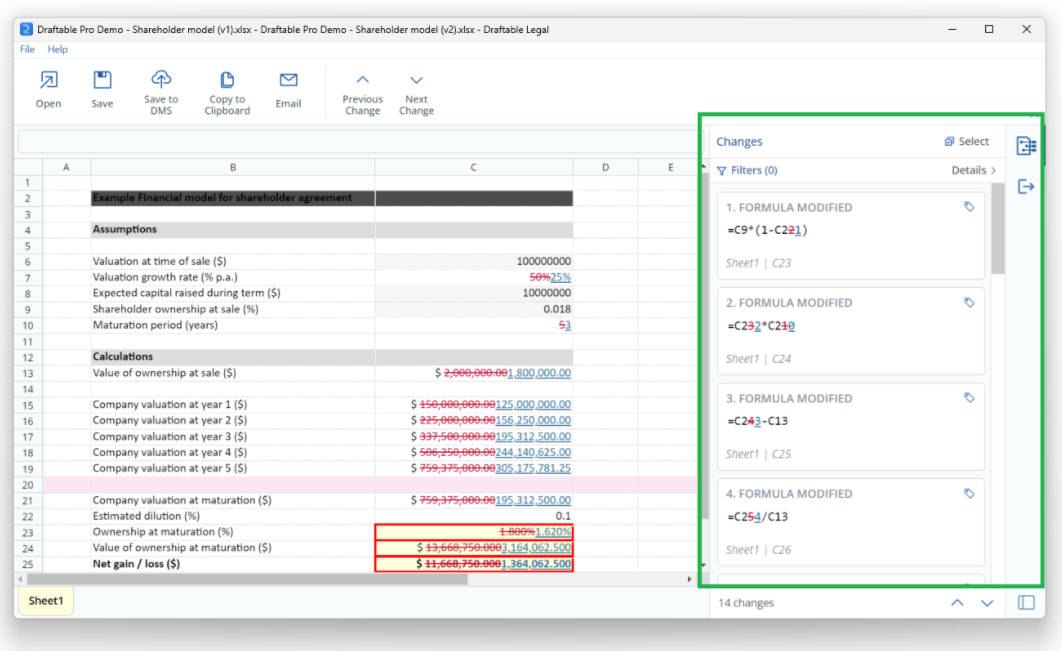
You can scroll through the Change List and click on any change to jump to its location and have the change highlighted with a blue box on both versions shown.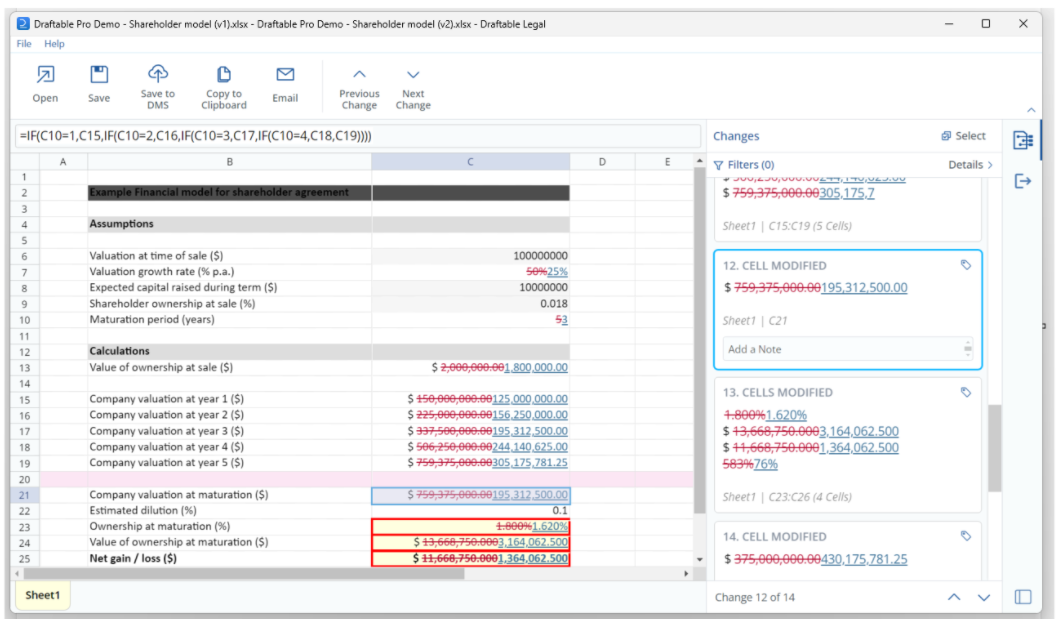
Users can tag changes by selecting the Tag Icon on the top right corner of the individual change card in the change list. This will display a list of 5 tagging options to choose from. Multi-tagging of changes is also possible.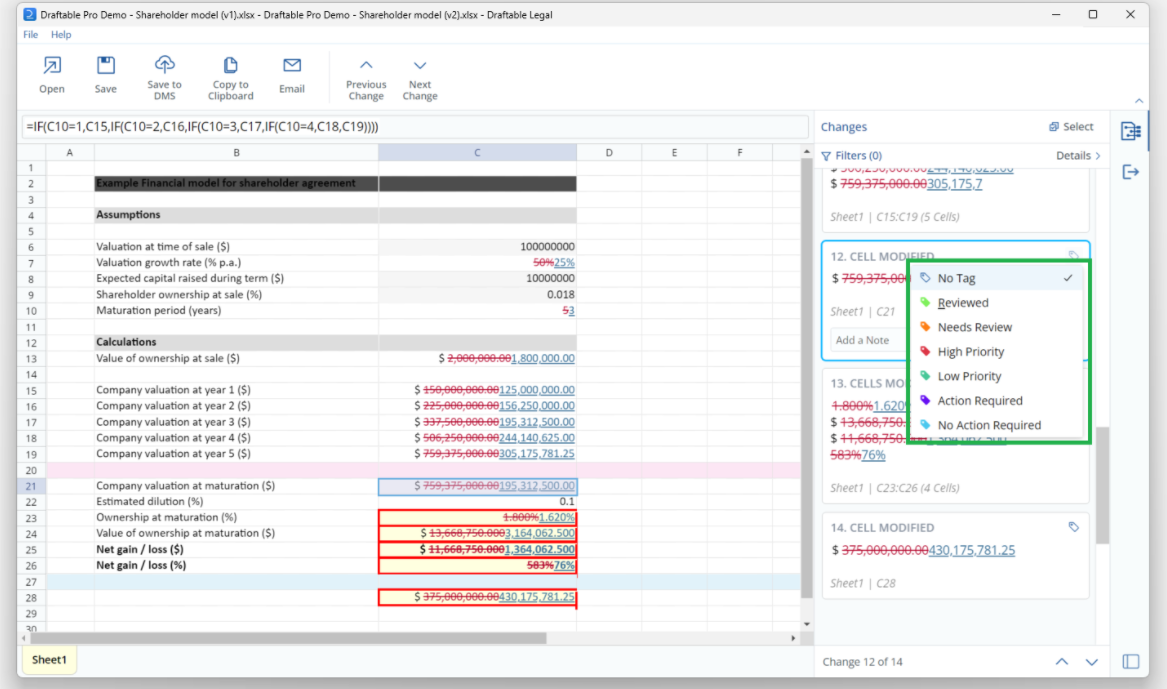
Users can also leave Notes on changes by selecting the Change Card, writing a note at the bottom of the card and hitting Enter to save the Note**.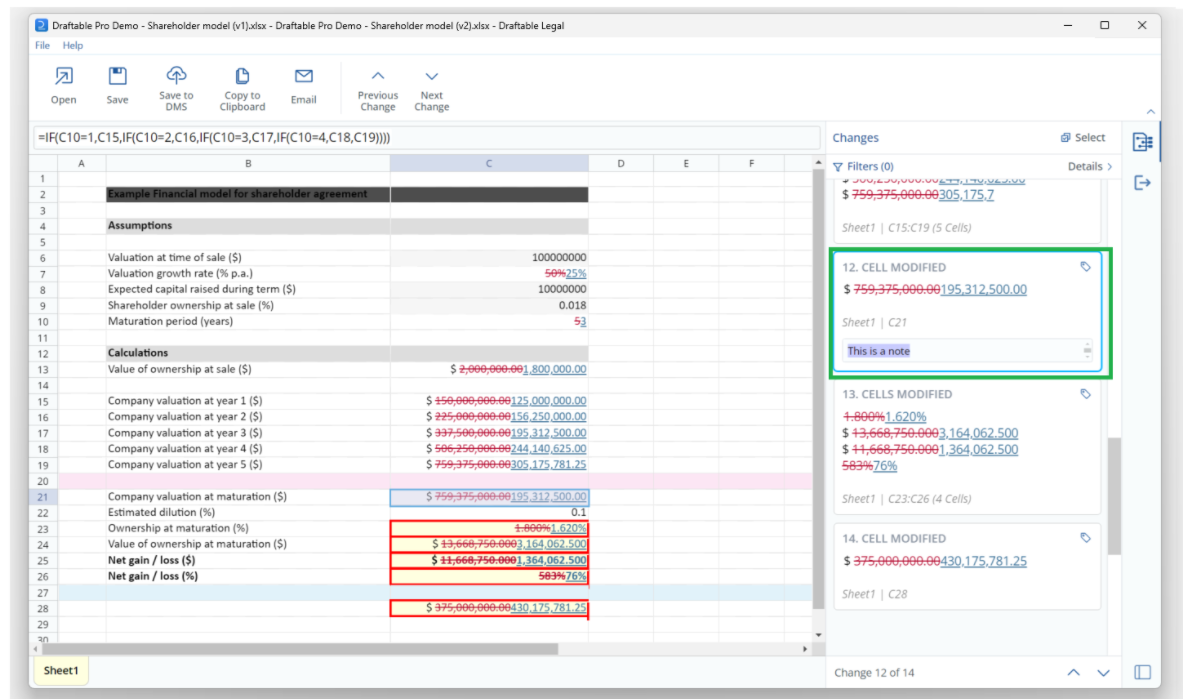
Users can filter changes by using the Interactive Filter Menu, available at the top of the change list. This can be opened by selecting the Details drop-down menu in the top right corner of the Change List.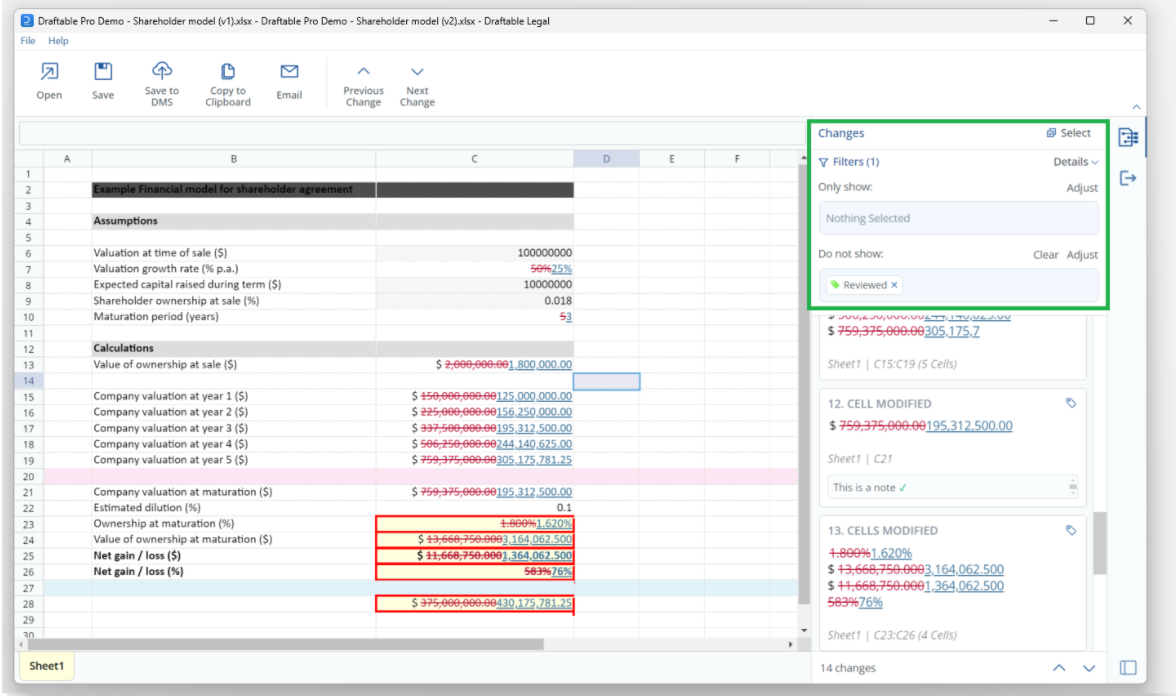
Users can see filtering options by selecting either the Only Show or Do Not Show entry forms. This will display a list of filtering options including Change Type, Style Changes, Tags and Notes.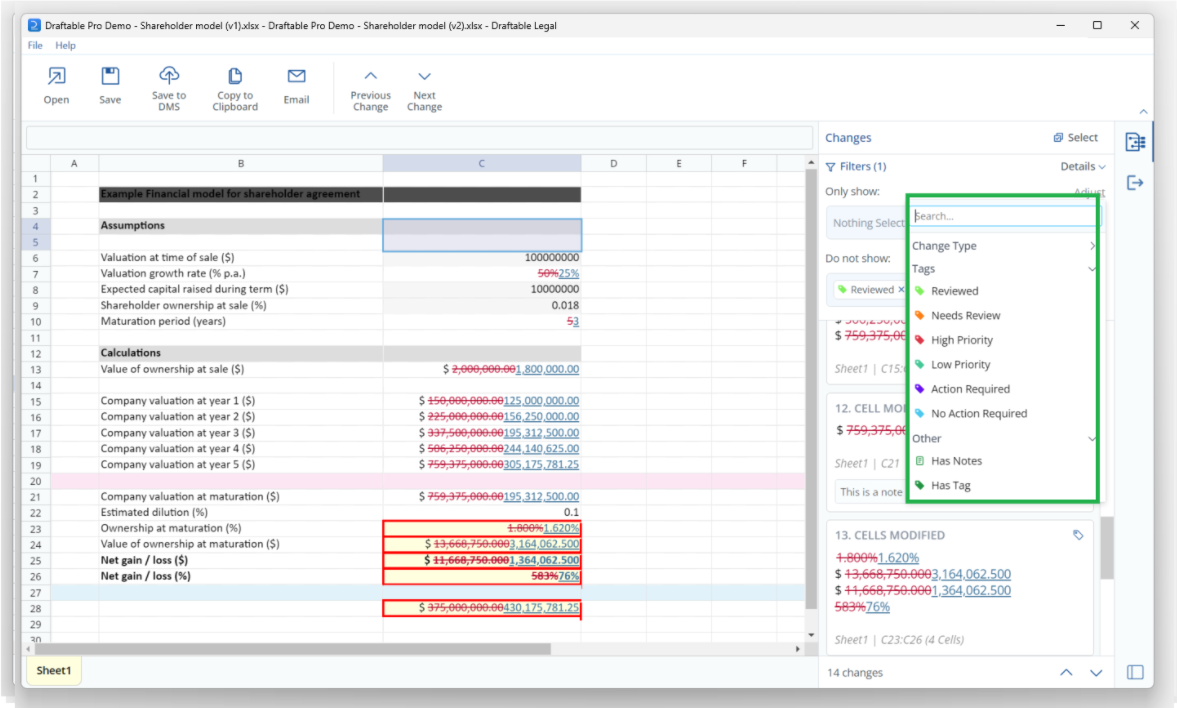
Once all review of changes is completed, users can share the comparison along with any Tags and Notes with colleagues or external parties via the many different output options shown in the ribbon menu.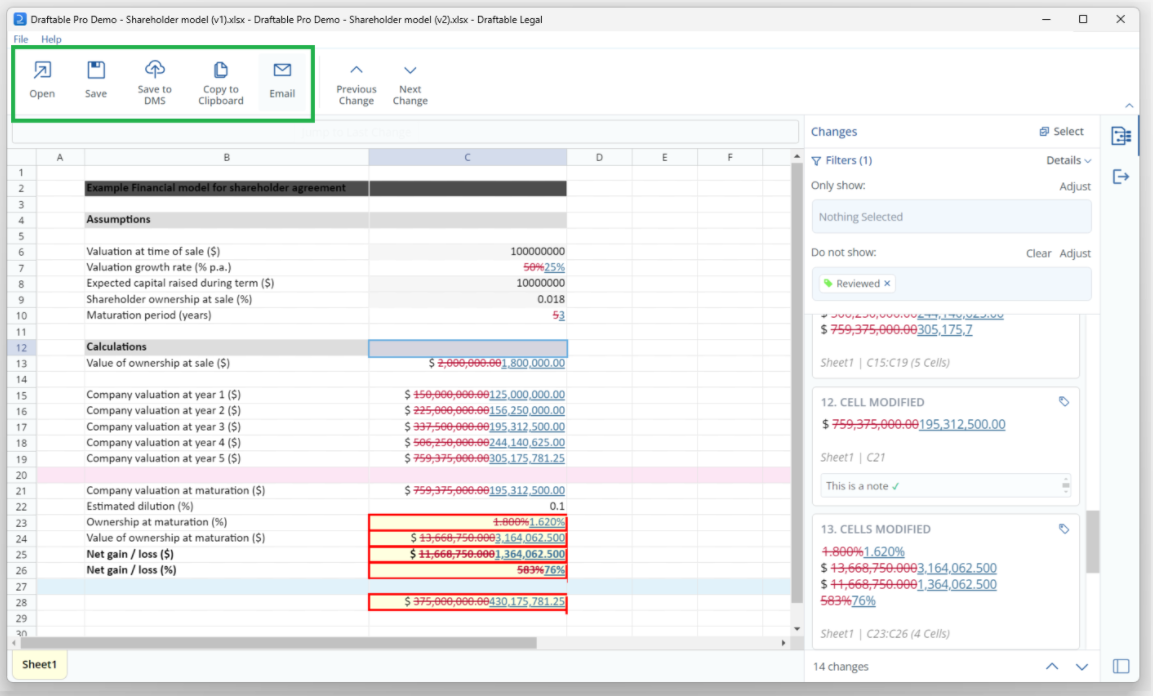
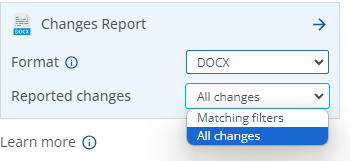
To share specific changes in notes and tags made in the comparison, ensure you click on the Changes Report option, in the many different output options.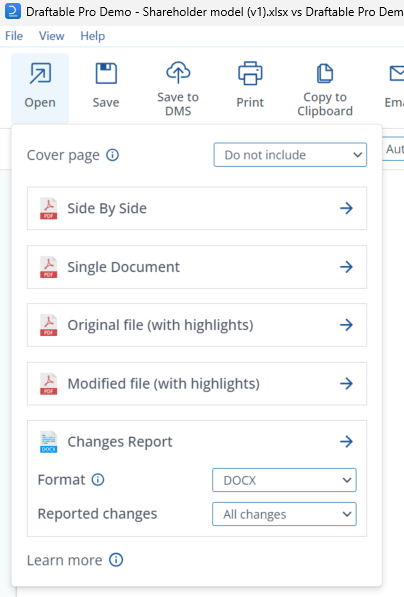

Comparing Excel files in the Redline Comparison Type in Excel

Select the two documents you want to compare, either by browsing your files or dragging and dropping them into the compare window.
Reviewing your comparison in Excel
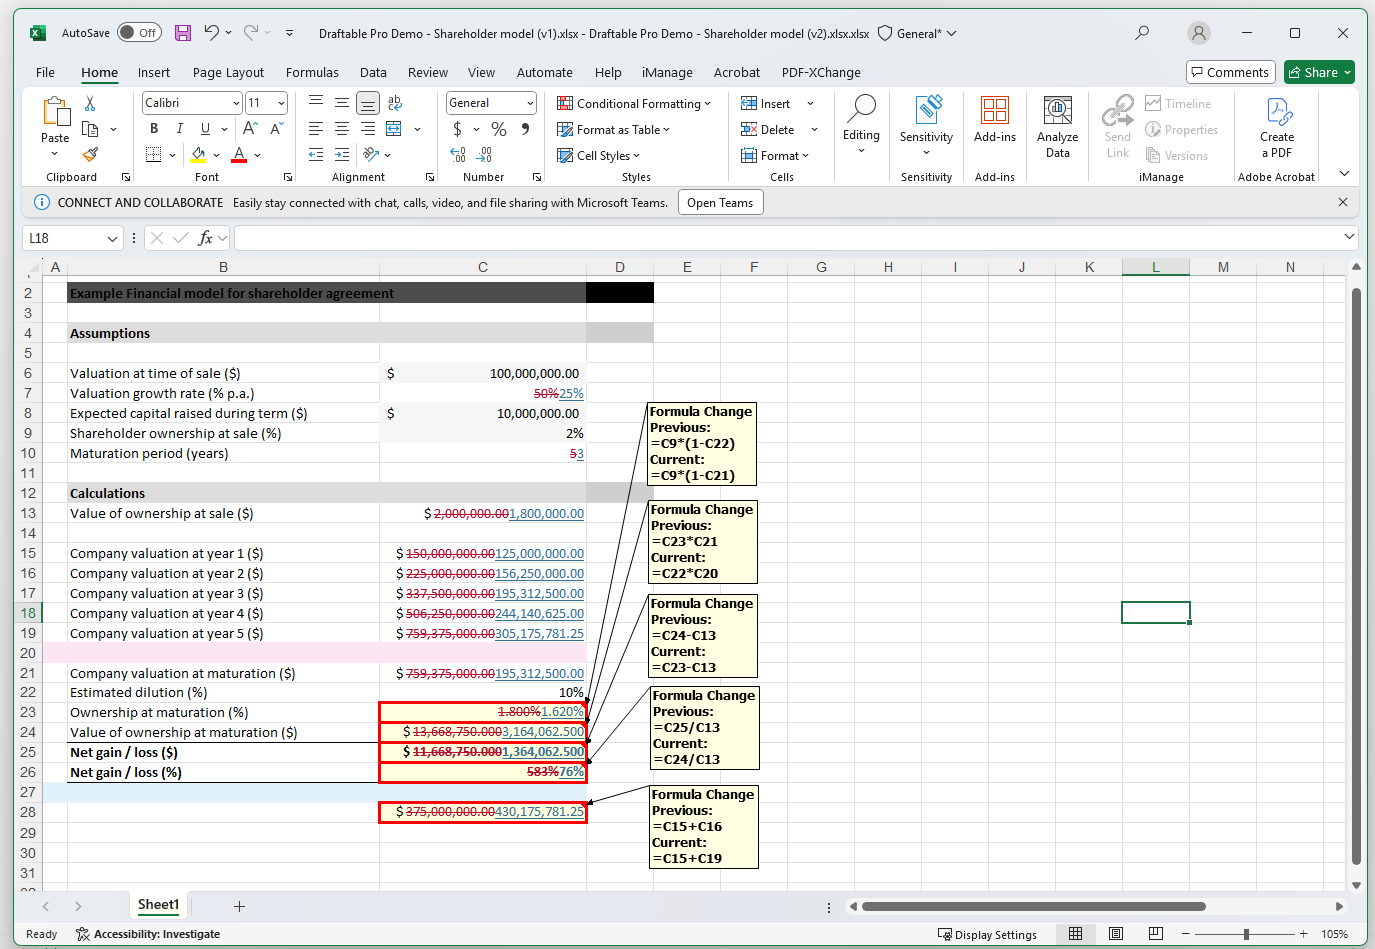
All changes are shown as Redline, where deletions and insertions are shown per cell, and formula changes are shown as comments with the cell highlighted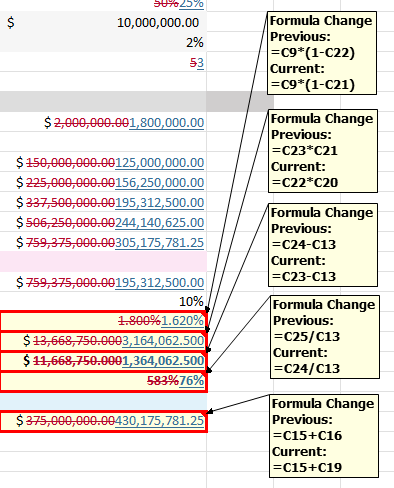
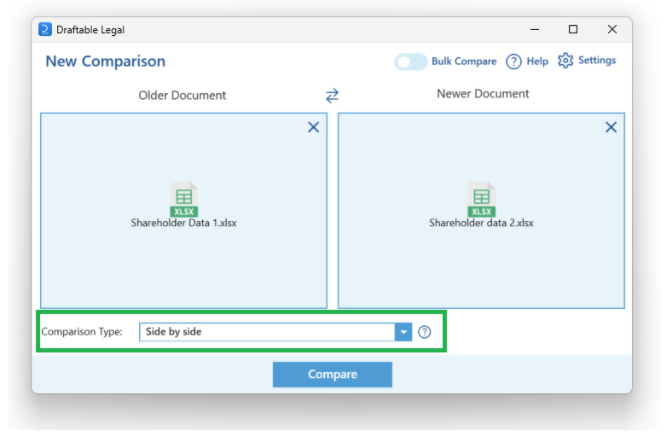
Comparing Excel files in the Side by Side Comparison Type
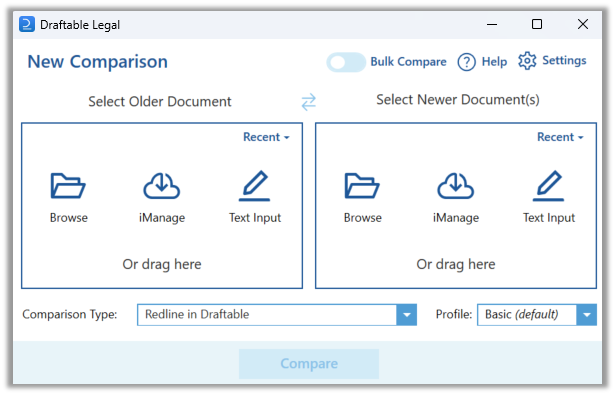
Select the two documents you want to compare, either by browsing your files or dragging and dropping them into the compare window.

Reviewing your comparison in Draftable
The Comparison Viewer shows all changes in a dynamic Change List on the right-hand side of the screen.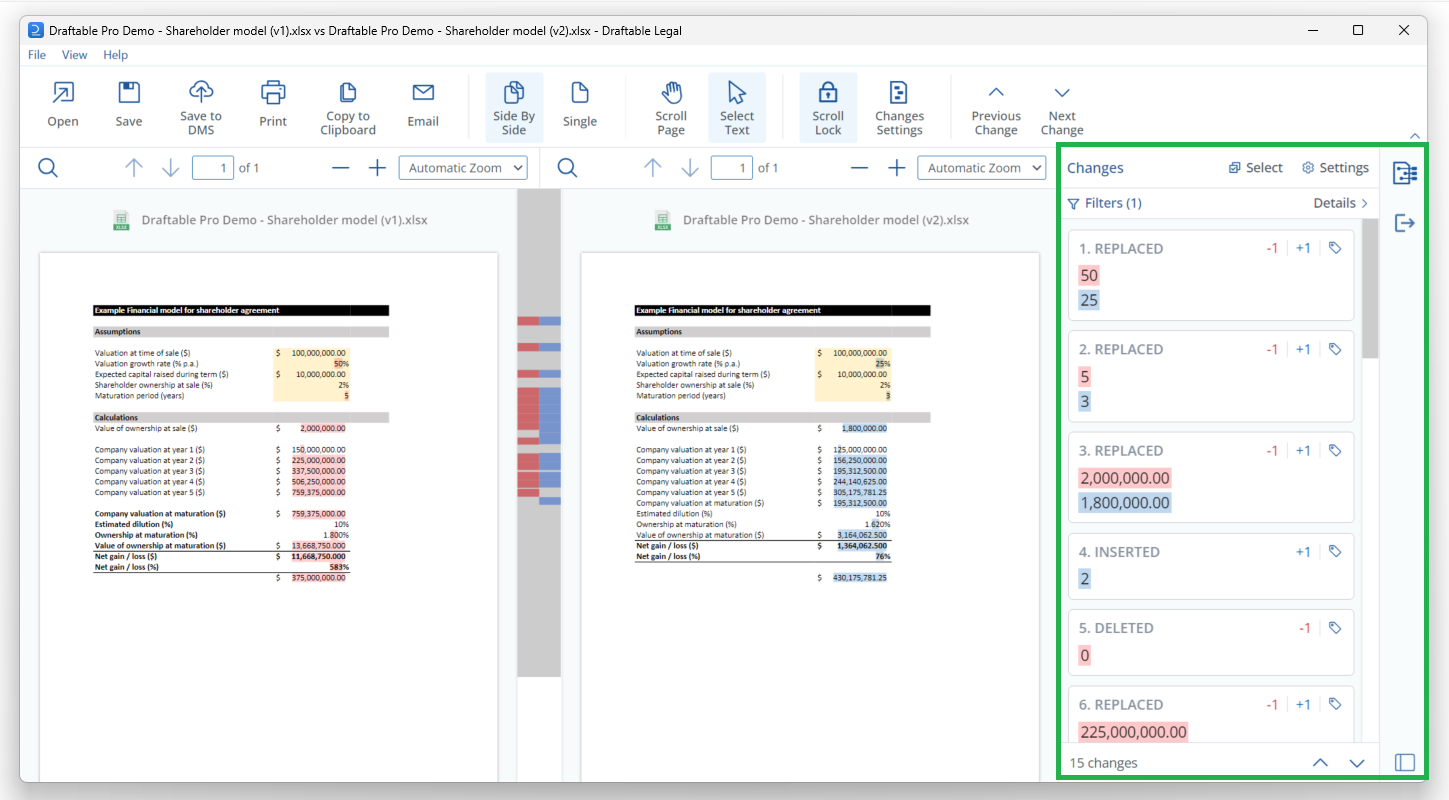
You can scroll through the Change List and click on any change to jump to its location and have the change highlighted with a blue box on both versions shown.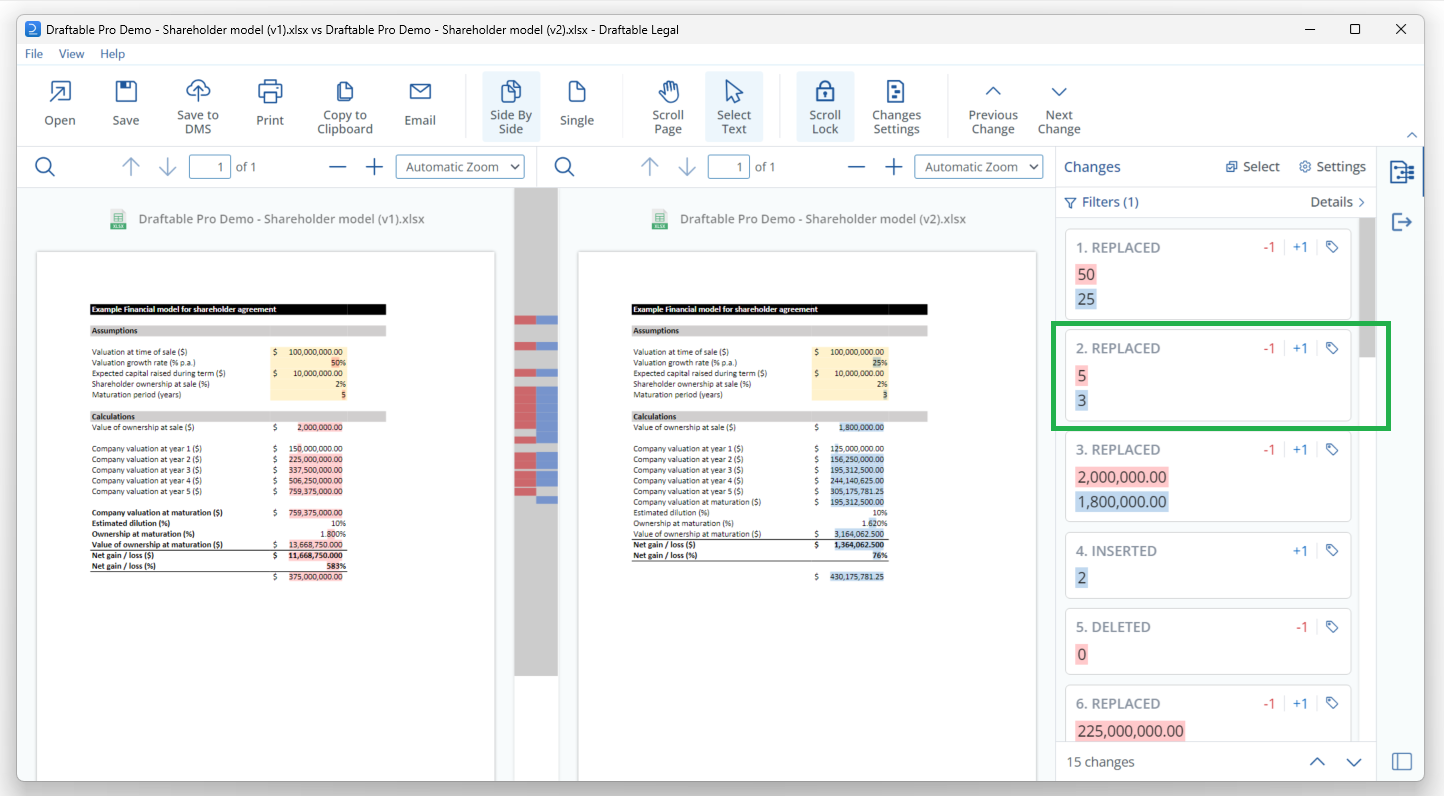
Users can tag changes by selecting the Tag Icon on the top right corner of the individual change card in the change list. This will display a list of 5 tagging options to choose from. Multi-tagging of changes is also possible.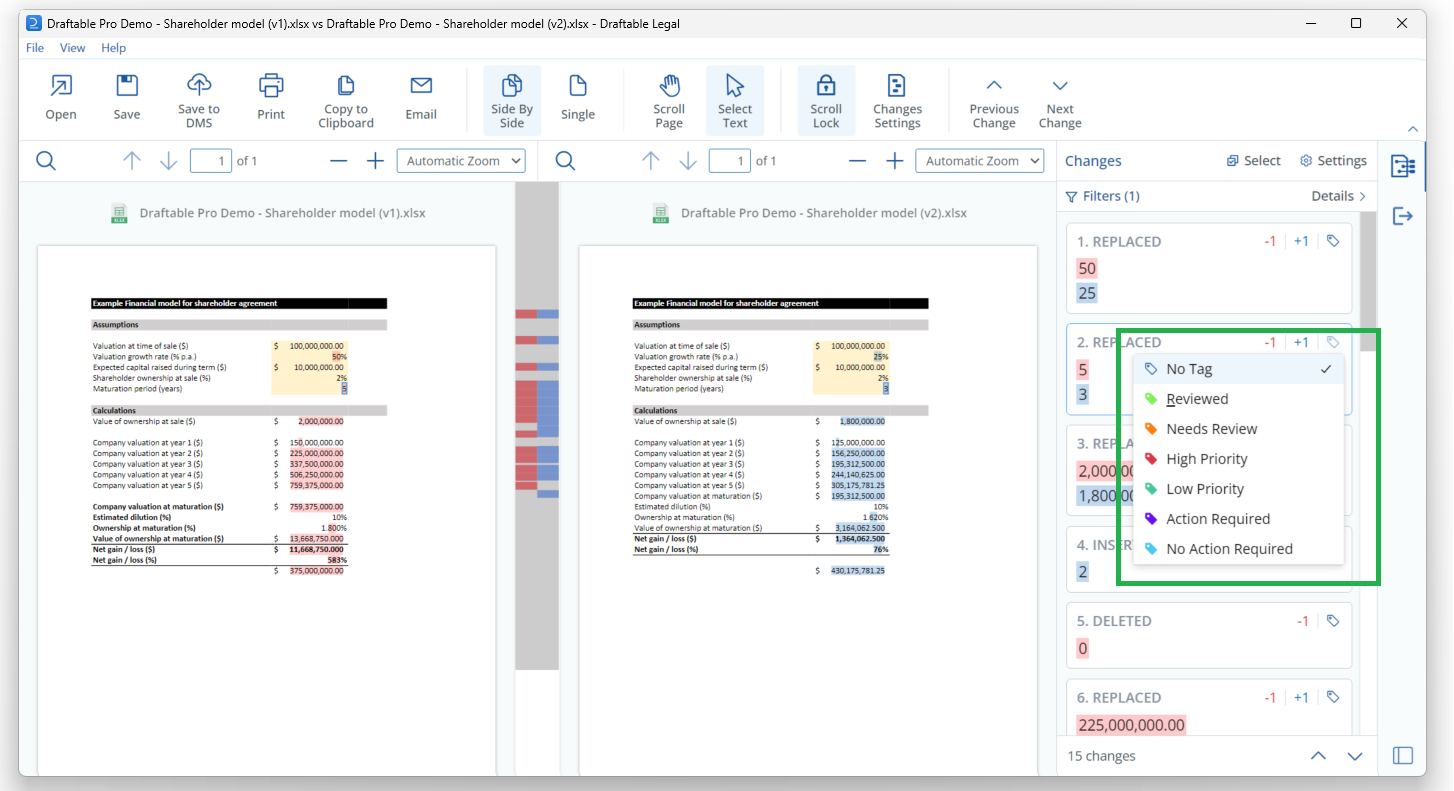
Users can also leave Notes on changes by selecting the Change Card, writing a note at the bottom of the card and hitting Enter to save the Note**.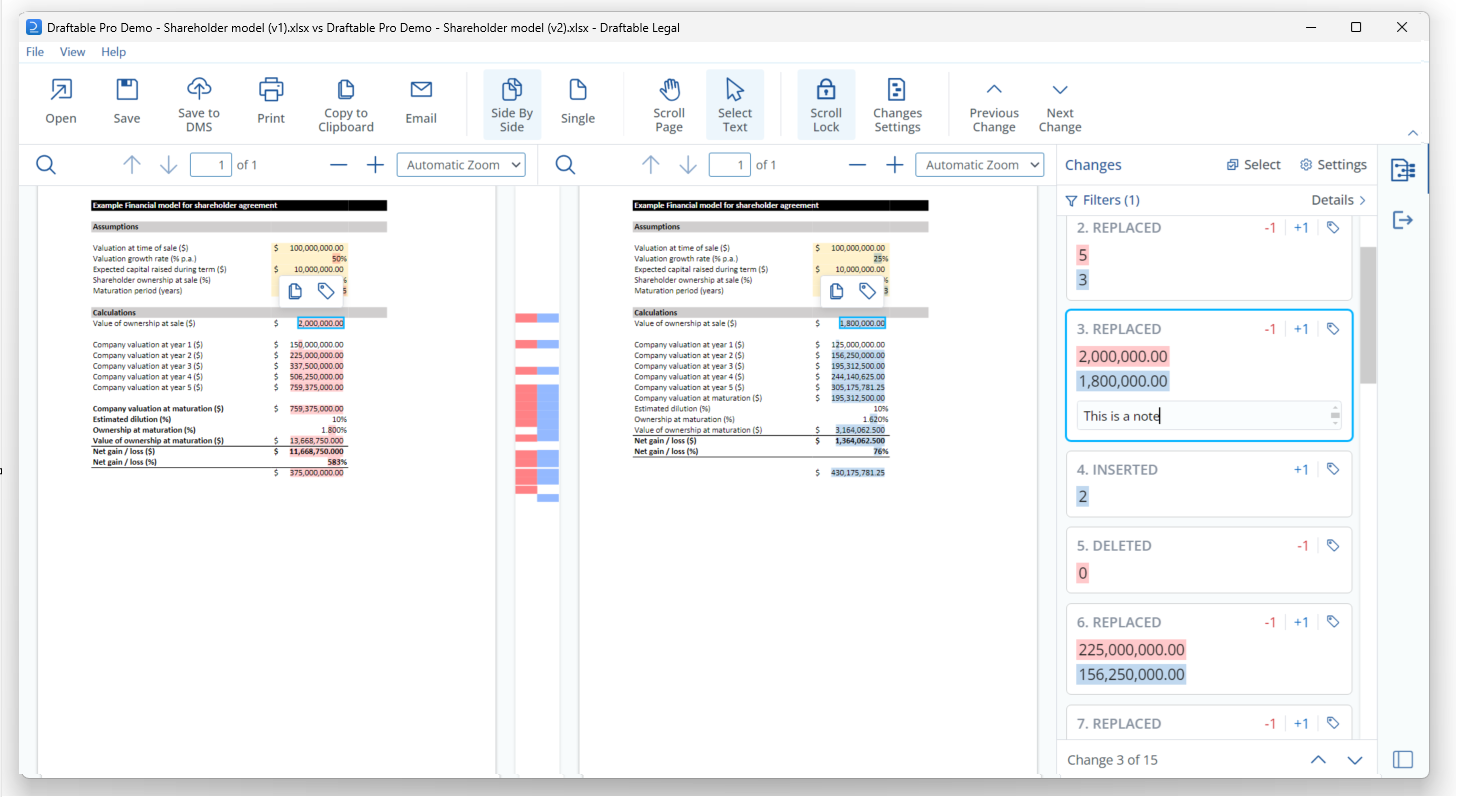
Users can filter changes by using the Interactive Filter Menu, available at the top of the change list. This can be opened by selecting the Details drop-down menu in the top right corner of the Change List.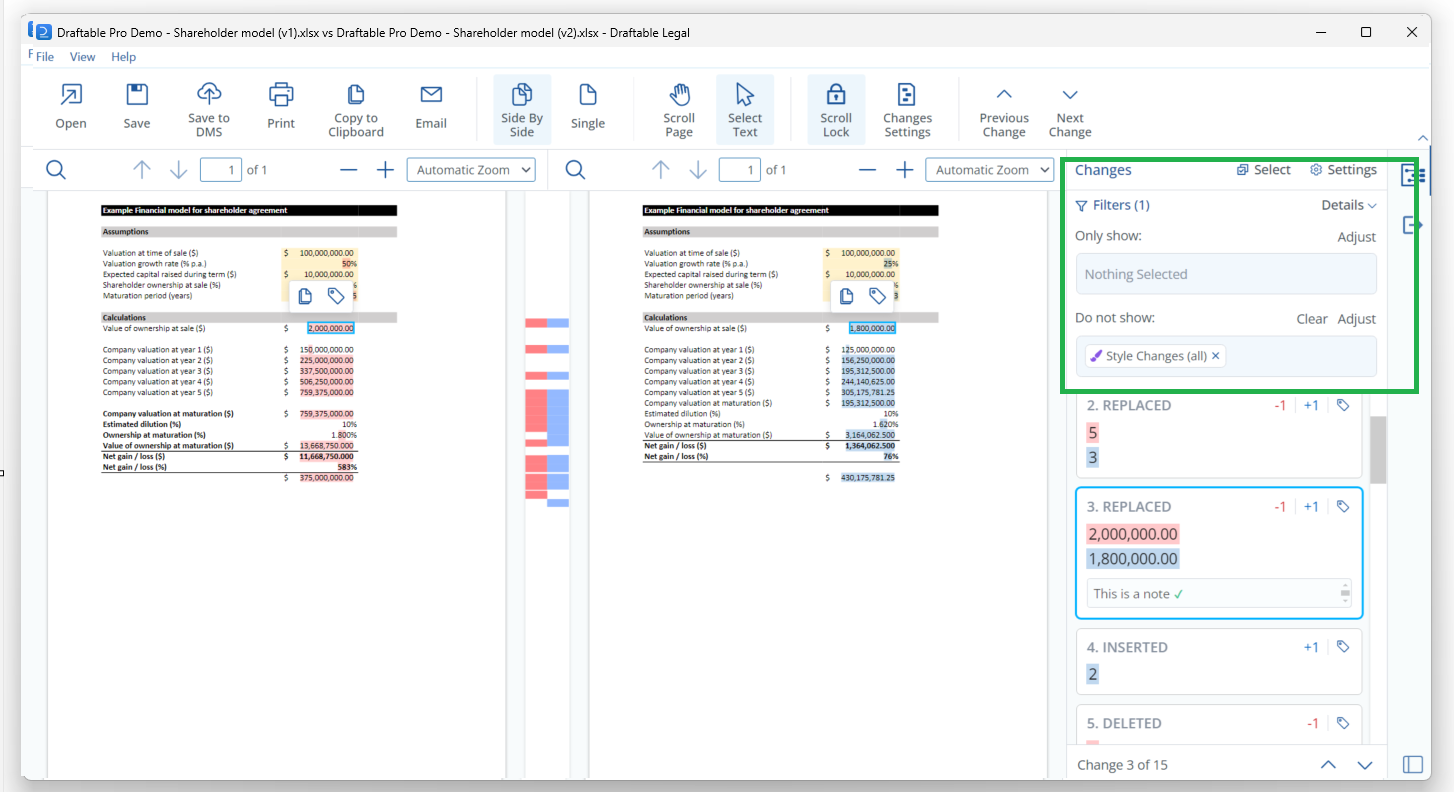
Users can see filtering options by selecting either the Only Show or Do Not Show entry forms. This will display a list of filtering options including Change Type, Style Changes, Tags and Notes.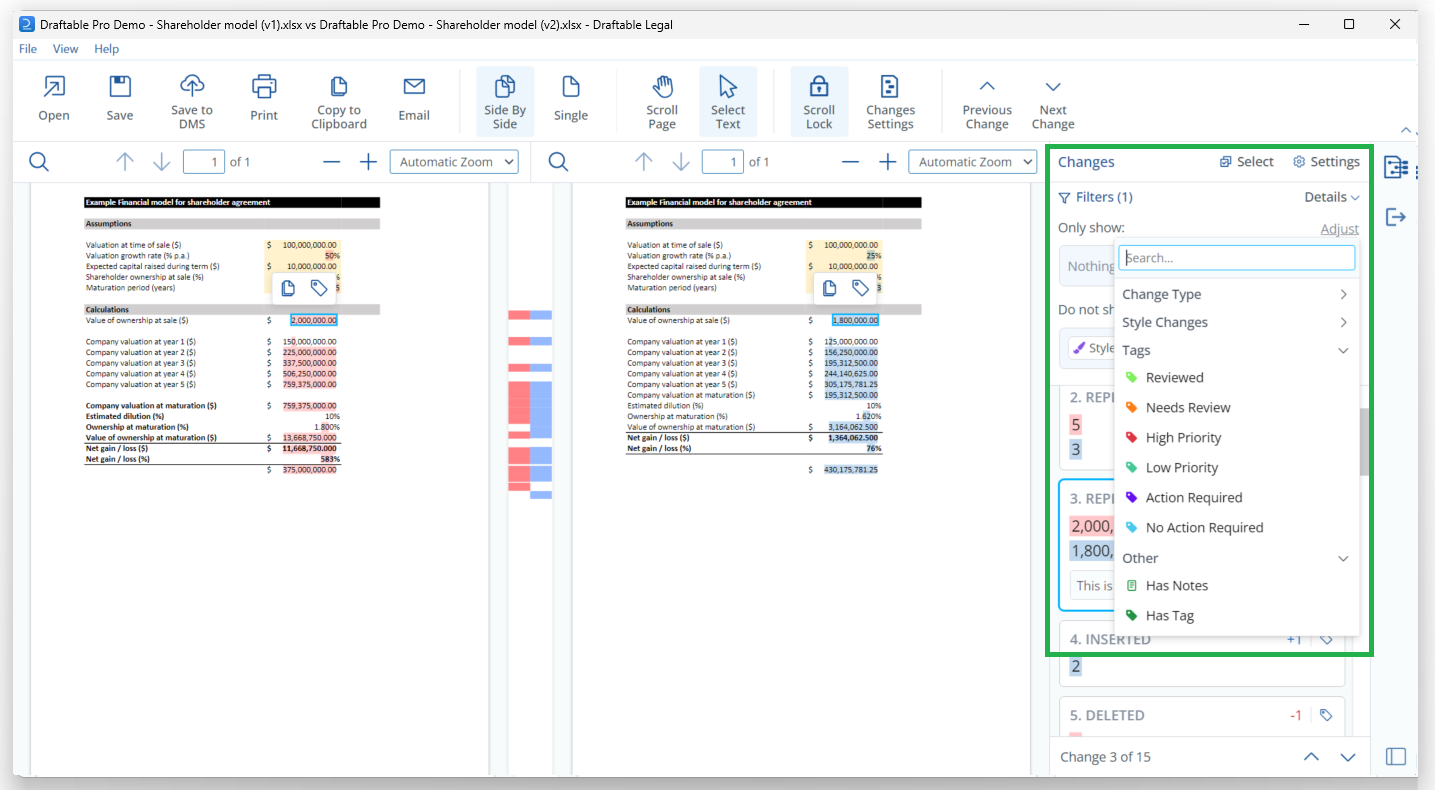
Once all review of changes is completed, users can share the comparison along with any Tags and Notes with colleagues or external parties via the many different output options shown in the ribbon menu.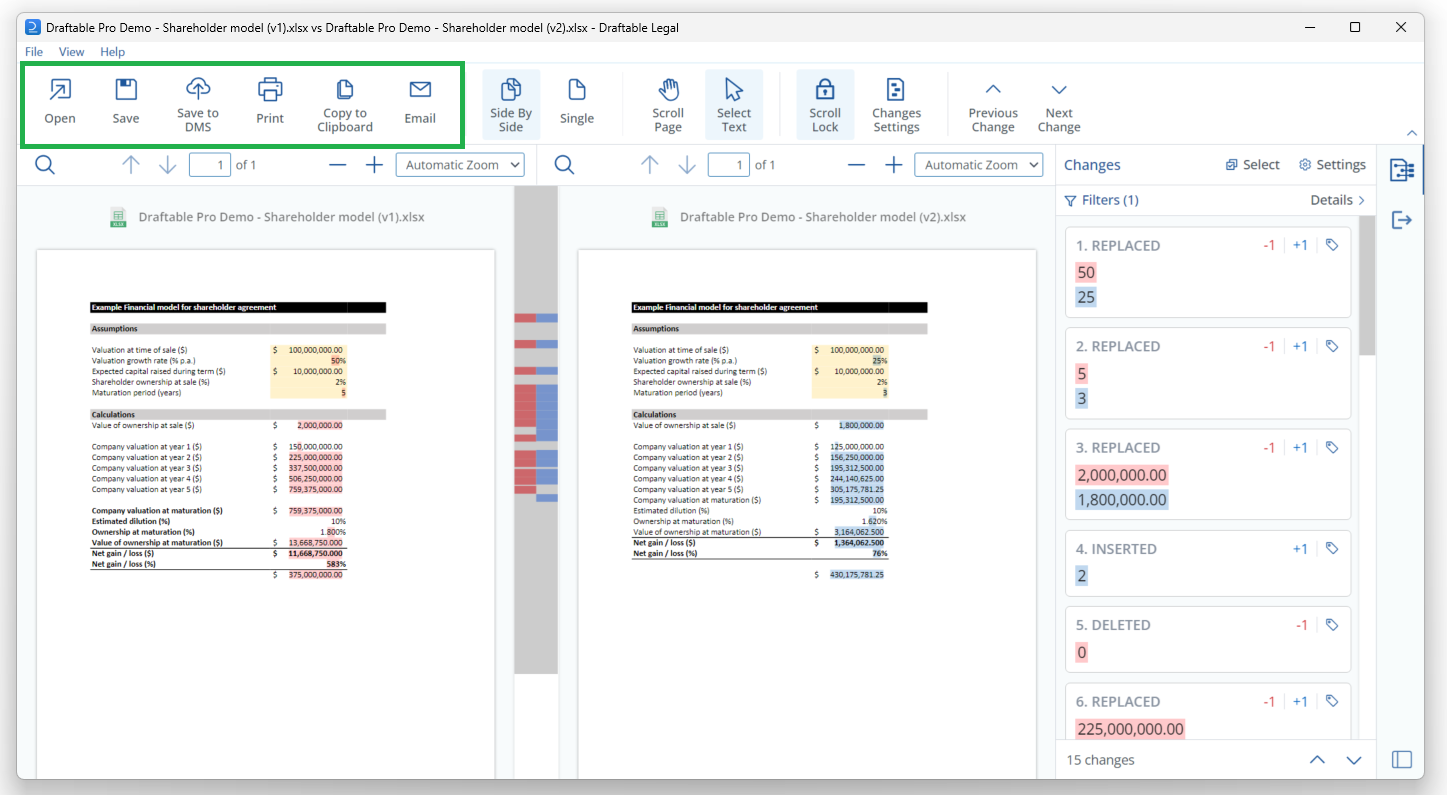
To share specifically changes in notes and tags made in the comparison, ensure you click on the Changes Report option, in the many different output options.


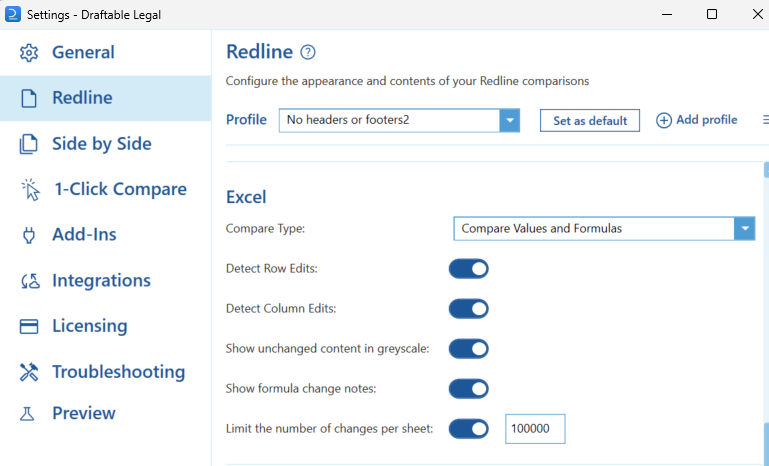
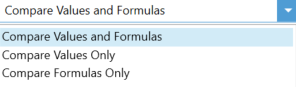
How to configure settings for Excel Redline compare
Settings for the Excel Redline comparisons can be found within the Redline tab of the settings menu. There are many options specific to Redline comparisons.