What is the Departures Table?
The Departures Table is a specialized report that helps you see how a document has changed—with full context. Instead of just showing edits inline or as redlines, it highlights the entire section or clause where a change occurred. This makes it easier to understand changes at a glance, especially in long or complex documents.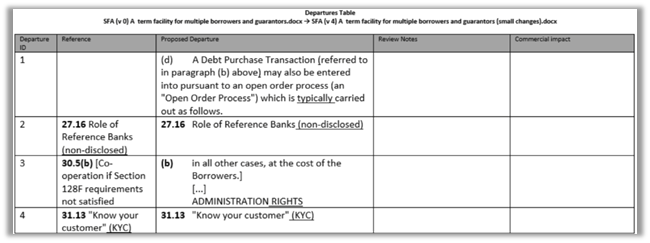
What Is It Used For?
The Departures Table is typically used during collaborative editing or negotiation processes. It’s especially helpful when:- You want to quickly review all meaningful changes without digging through redlines.
- You’re working with large documents and need a summary that highlights changes in full paragraphs or sections.
- You need a clean, shareable summary of updates to send to others for review or approval.
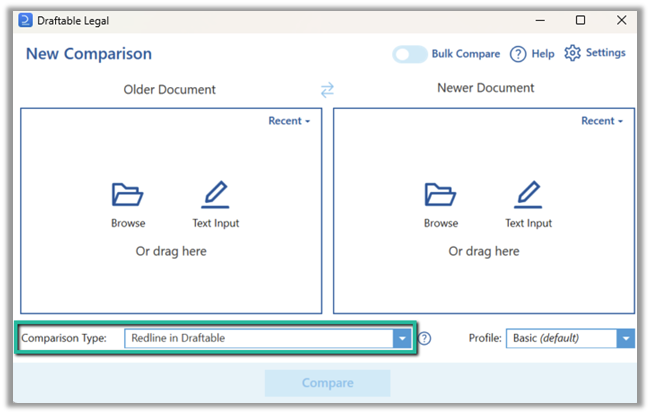
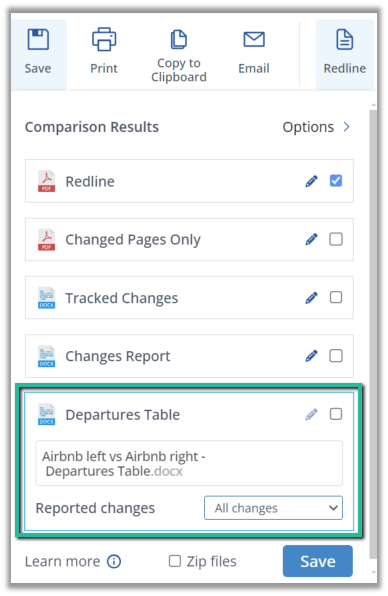
How to export a Departures Table
How to configure a custom Departures Table template
Draftable includes a default Word document template for the Departures Table, but you can customize this to suit your needs. This can be achieved by adding your own custom template and overriding the default template.Navigate to Draftable installation folder, e.g. 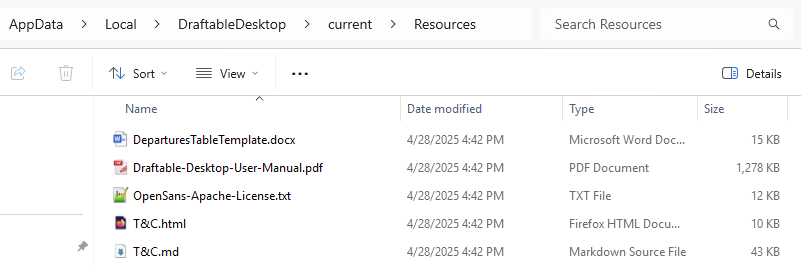
%LOCALAPPDATA%\DraftableDesktop\current or C:\Program Files (x86)\Draftable\Draftable Desktop and open Resources folder.Create a copy of DeparturesTableTemplate.docx file and open it in MS Word and enable it for editing.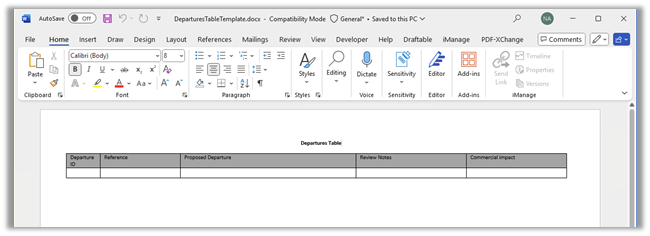
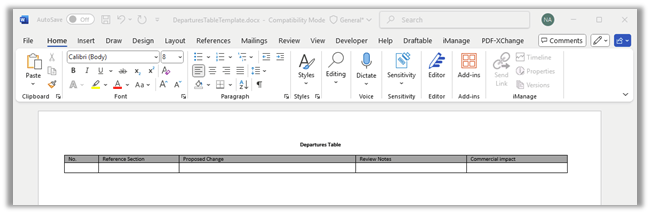
Edit the newly created, copied Departures Table template according to your needs. Please, however, adhere to the requirements for the table:At least four columns for the following content in the following order:
- Departure ID
- Section Reference
- Changed clause (departure)
- Review notes/comments
- A table header
- An empty row
Style the document according to your needs
- Elements that can be customised:
- Header and footer
- Font family and size
- Table header titles
- Adding more table columns on the right-hand side
- Elements that cannot be customised:
- Removing or adding columns at position 1-4 (as mentioned above)
-
Changing the order of columns at position 1-4 (as mentioned above)
Deploying a custom Departures Table template
Copy the document created to the Microsoft Office templates folder, typically at: %AppData%\Microsoft\Templates
Restart Draftable by exiting out of the application completely. Do not just close out the New Comparison window. (Guide here on how to correctly restart Draftable)