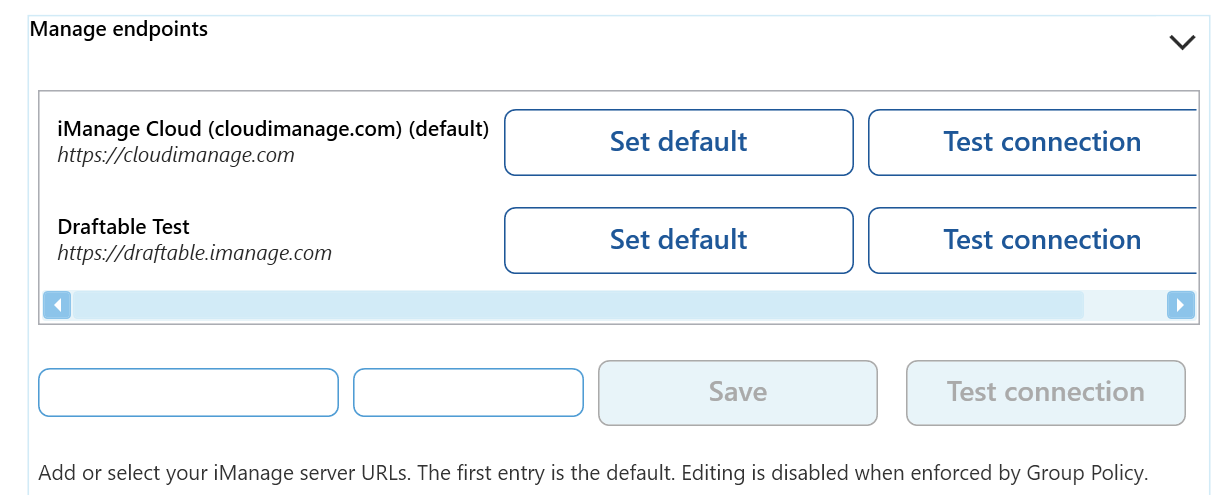
The settings menu was reorganised in Draftable Legal 26.6. If you are on 26.6 or later, follow the “26.6 and later” tabs below. On earlier versions, follow “Before 26.6”. To check your version, open Settings. The version number shows at the bottom-left (for example, v26.6.0).
Connecting your iManage account to Draftable Legal
Depending on what version of Draftable you are using, there are two different procedures you need to follow depending on the version.If you are using Draftable v25.9.300 or earlier:
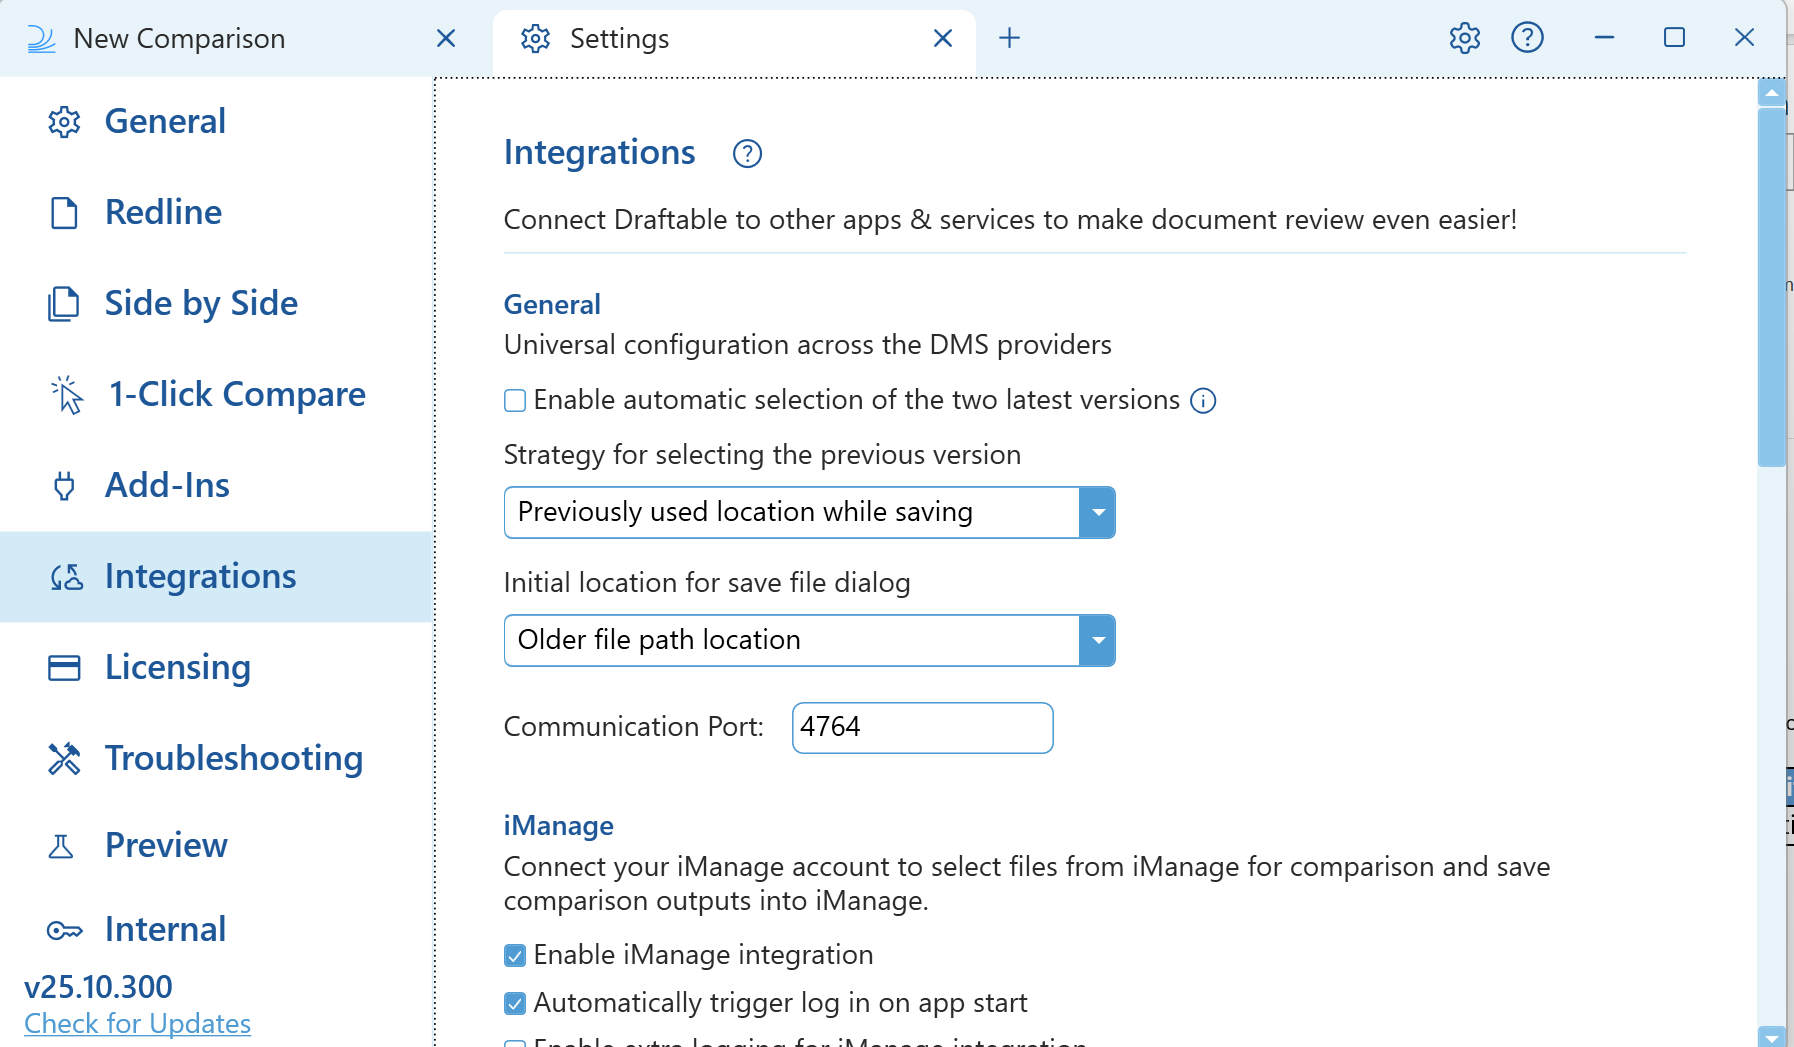
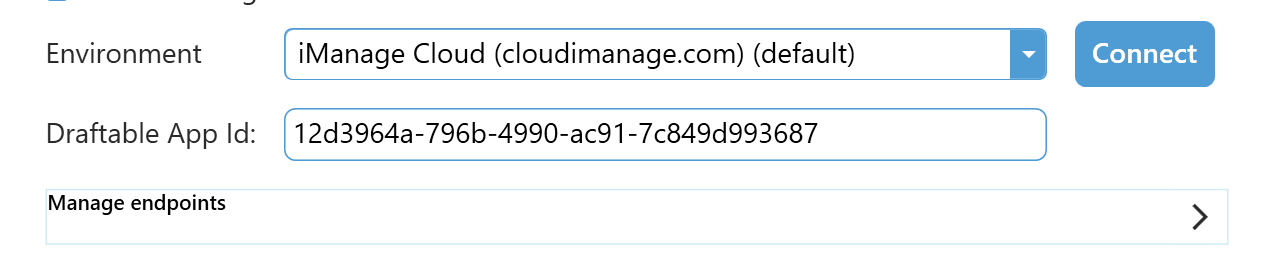
Now we need to ensure that we are logging into our cloud iManage account. Open the iManage settings and select cloud. Ensure you have logged into iManage on your Draftable Legal application. This can be done following the process below.1
Open the settings menu and navigate to the iManage settings.Open the Integrations section of the settings and select iManage.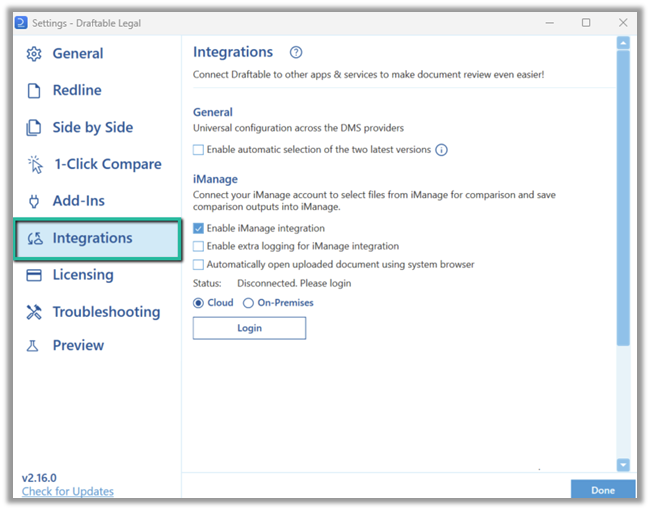
2
Click the Login button and enter your credentials for your iManage account. It should display as Connected as with your correct account details if done correctly.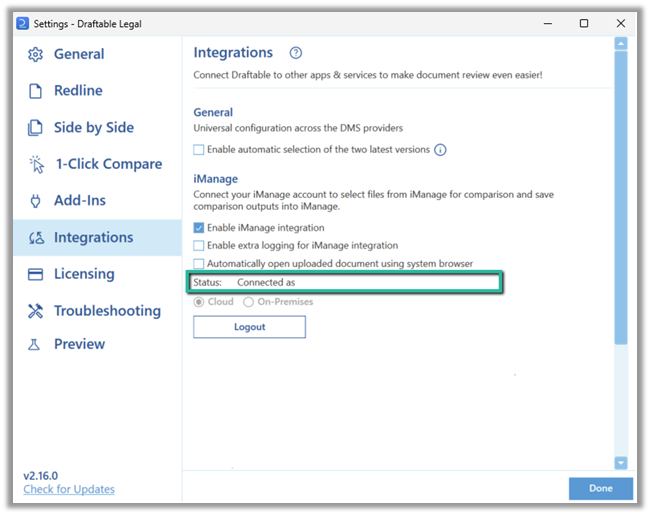
If you are using Draftable v25.10.000 or later
- 26.6 and later
- Before 26.6
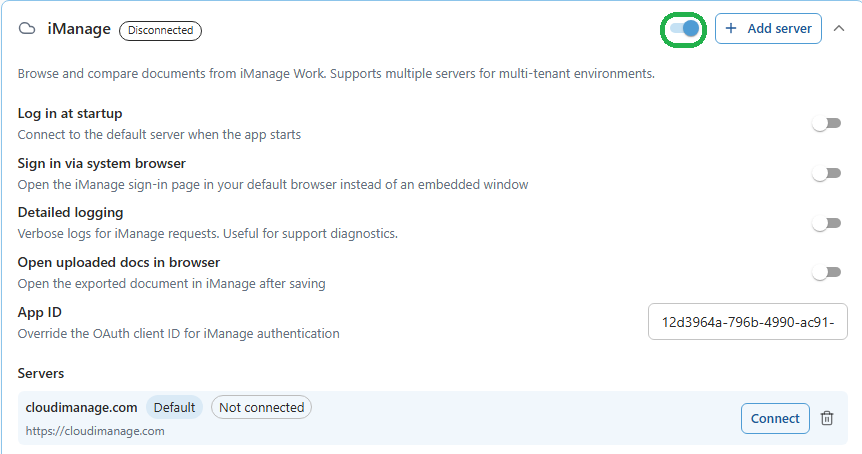
Before you can connect, you need to turn on the iManage integration. In the settings menu, select DMS Connections, find the iManage section, and switch on its enable toggle. The connection options and Servers list only appear once iManage is enabled.
1
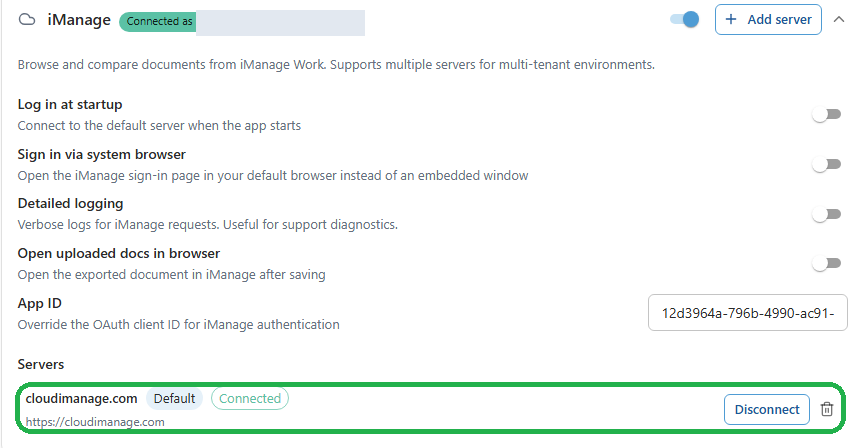
Open the settings menu, select DMS Connections, then expand the iManage section.Here you can manage your connection options, including Log in at startup, Sign in via system browser, Detailed logging, Open uploaded docs in browser, and App ID. Your iManage servers are listed at the bottom under Servers.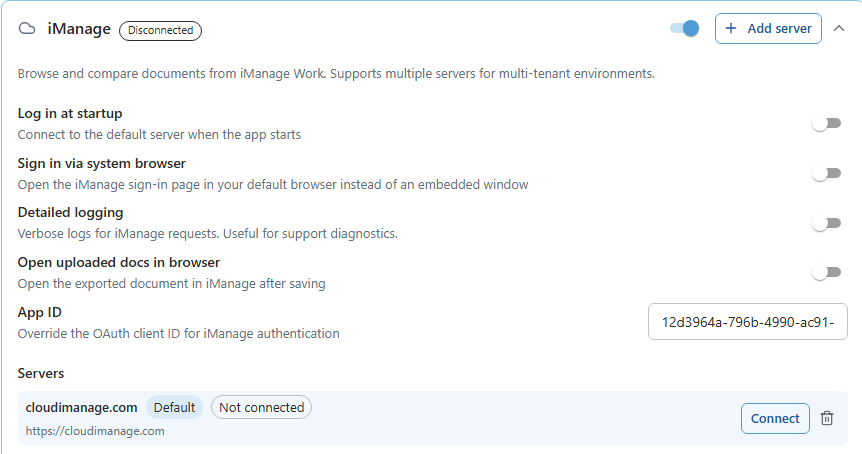
2
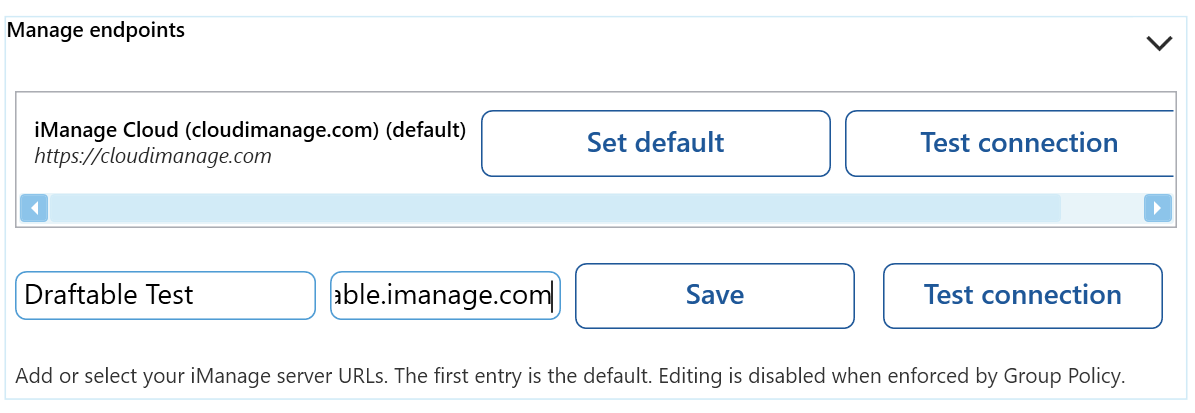
To add a server, click Add server. In the Add iManage Server dialog, enter your iManage Work server address in the Server URL field (for example, 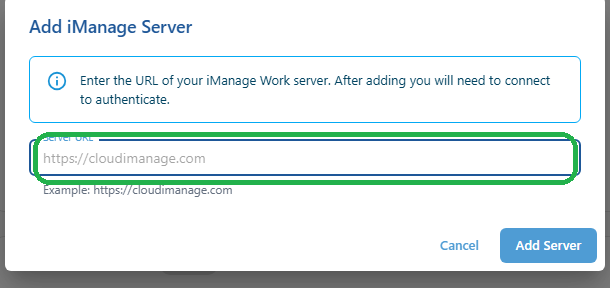
https://cloudimanage.com), then click Add Server.In 26.6 and later the dialog has a single Server URL field. There is no separate name field; the server name is taken from the URL. You connect and authenticate after the server has been added.
3
The server is added to the Servers list. You can add more than one server if you work across multiple tenancies.
4
Find the server you want to use in the Servers list and click Connect, then enter your iManage credentials (unless they have already been configured by Group Policy).
5
Once authentication succeeds, the connection is validated: the iManage header shows a green Connected as badge with your account, the server is marked Connected in the Servers list, and its Connect button changes to Disconnect.